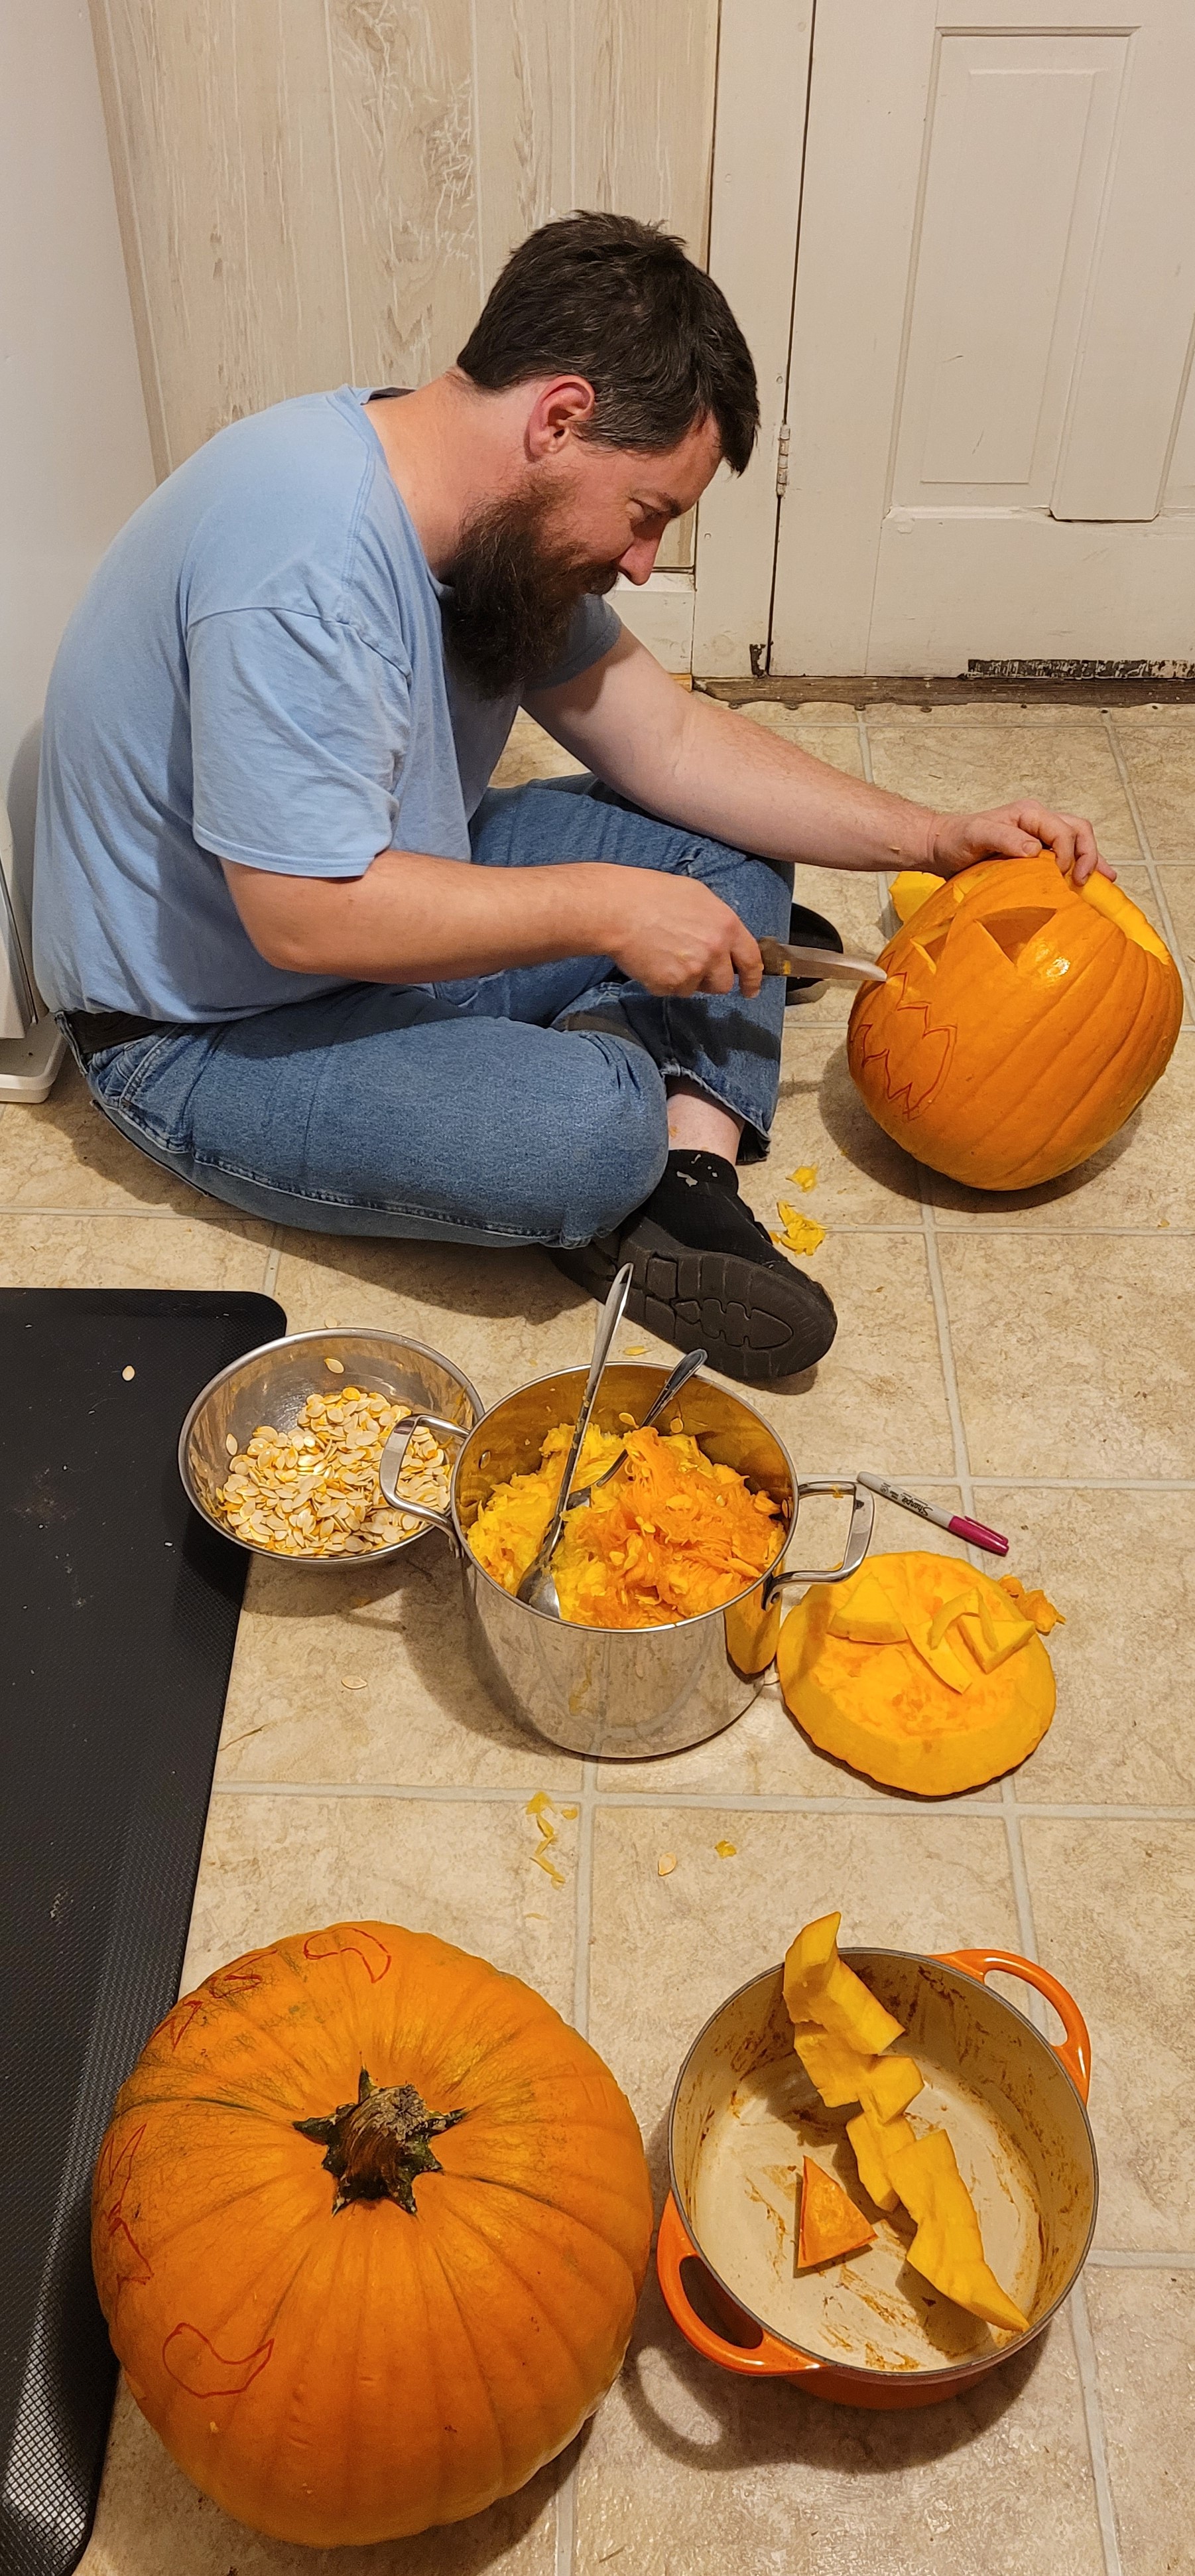
Late autumn, time to hunker down and store some vitamin A! Pumpkin and winter squash season is well underway, and I don’t know about you, but we are up to our elbows in fleshy orange goodness. It started with a Halloween carving session, tempered by a current lack of compost pile and desire to cut down on waste.
I went rogue and cut my pumpkin open from the bottom. It wasn’t the most resounding success and it was difficult to line up perfectly, but it was worth it for not having to stick my arm into the pumpkin to light the candle!
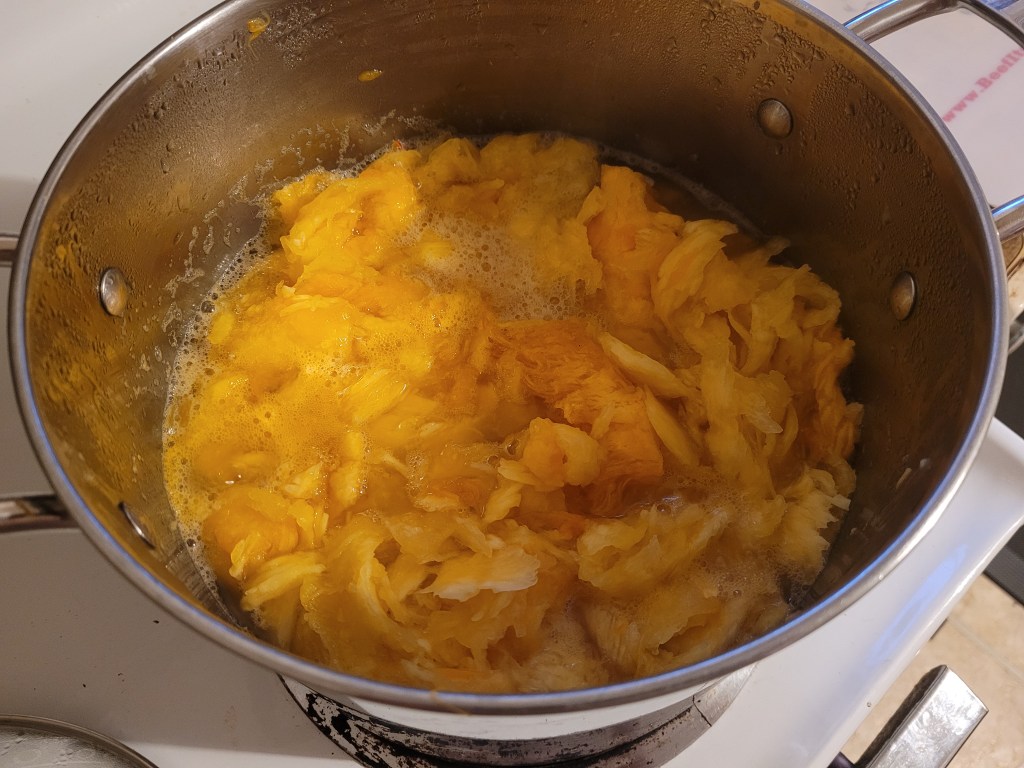
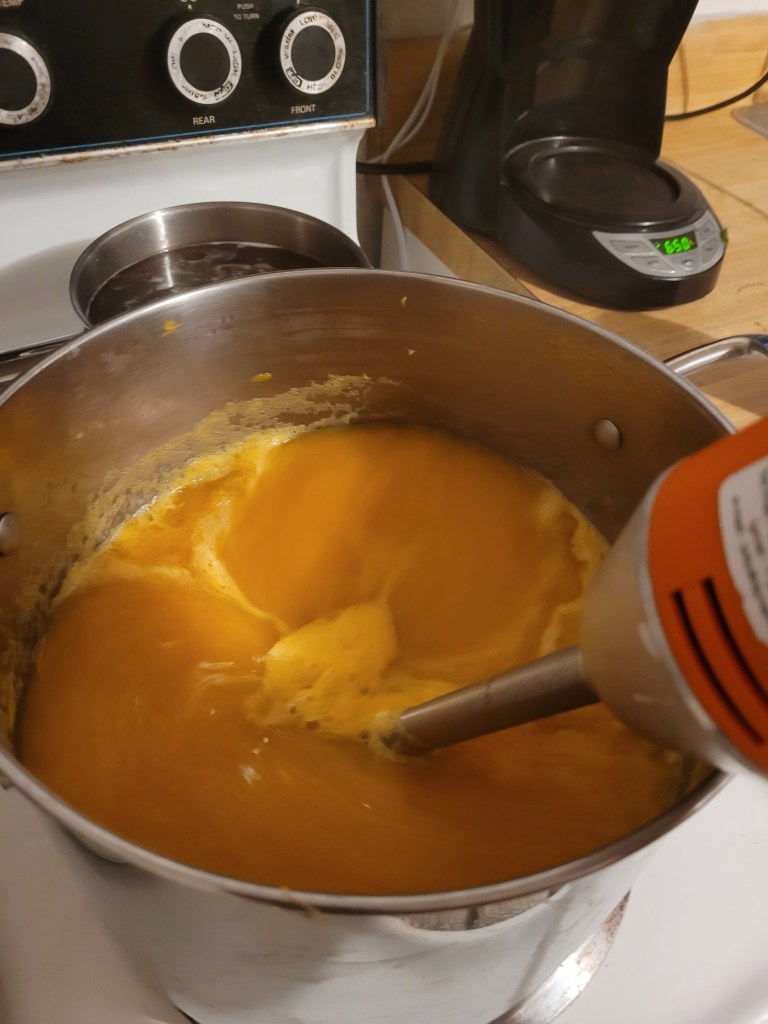
Seeds were roasted (rinsed, patted dry, 5 mins at 350 until dry and tacky, tossed with olive oil and salt, roasted ~20 minutes, stirred roughly every five minutes until lightly golden brown and smelling toasty) – the best we’ve ever made; and the innards were cooked down on low heat over many hours (at least eight) until darkened, thickened, and smoothed out with an immersion blender before cooking down some more. Carving pumpkins are notoriously watery, cooking them down takes more than twice as long as squash grown for comestibles.
This was all, of course, prior to cooking any of the cucurbits purchased for the purpose of consuming.
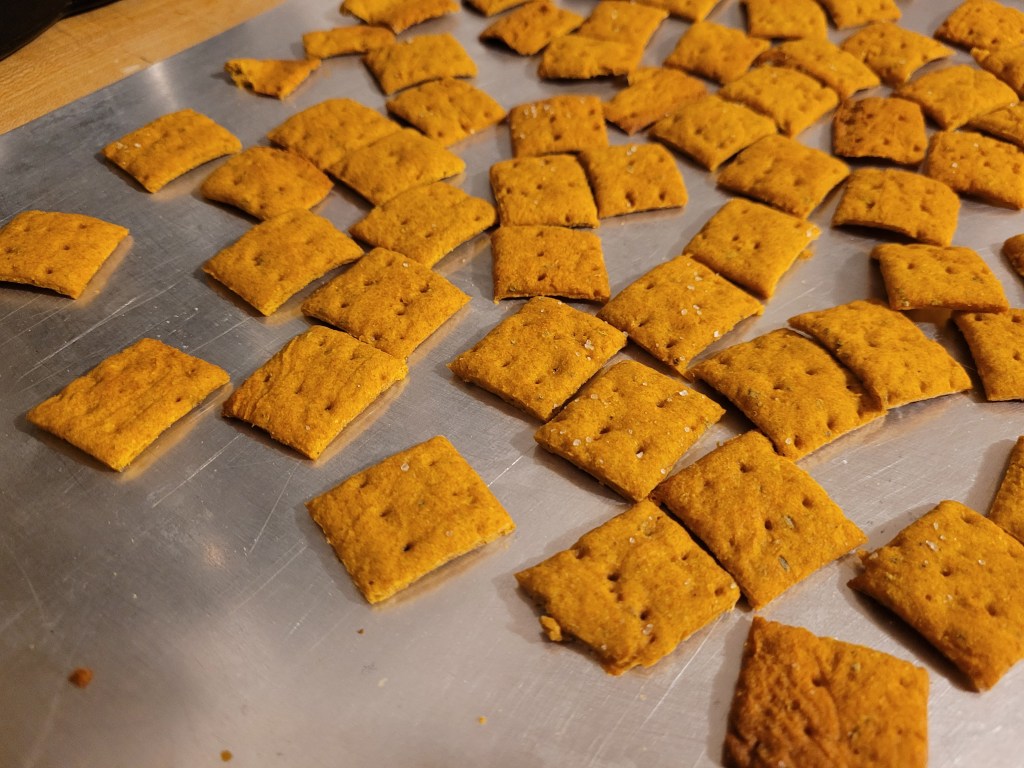
This puree has already taken many forms:
Dog treats and sea salt sage crackers
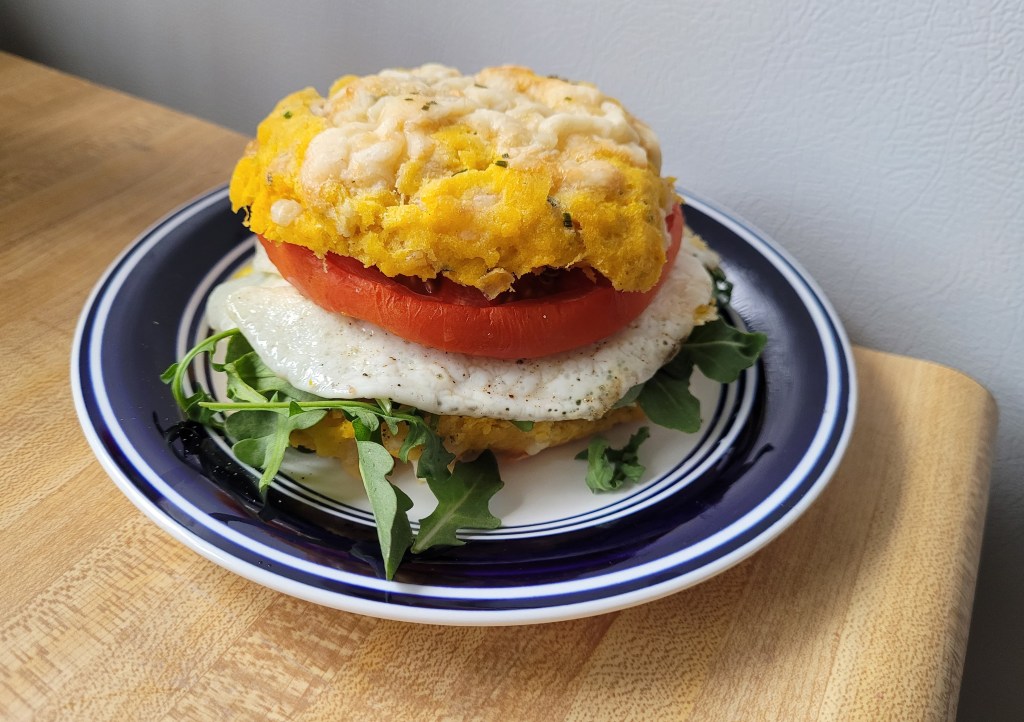
Savory cheesy scones (perfect for breakfast sandwiches)
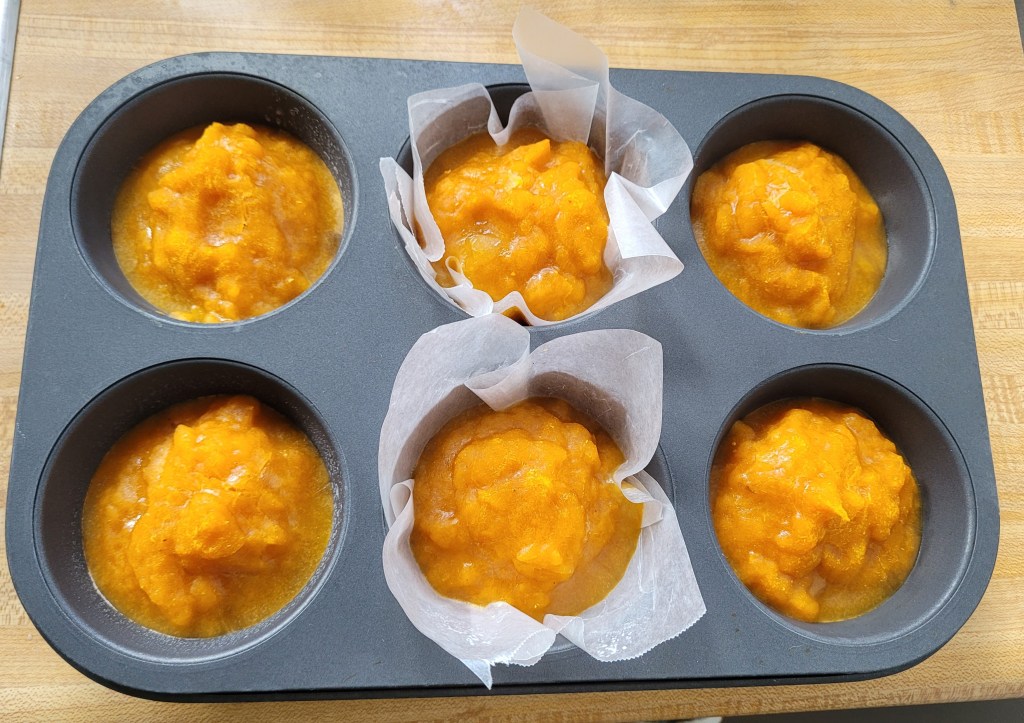
And I experimented with the best way to freeze pumpkin puree. Using a 1/2 cup measuring spoon and muffin pan, I tried three ways. Oiled, wax paper lined, and plain. The verdict?
If your muffin pan is nonstick, save yourself time and oil. Plopping the pumpkin in plain lets it pop out easier than ice in an ice cube tray. Store in a zip top bag in the freezer for sauces, soups, and baked goods throughout the winter.
PSA: do not use wax paper, it sticks and tears and you’ll have to thaw the pureed pumpkin and start all over again. Or you can thaw it, add some maple syrup, and experiment with dehydrator pumpkin leather. Will it work out? Or will we end up with chunks of sweet, crunchy pumpkin bark? Update pending… still a few more hours of dehydrating to go.
All this from the typically discarded innards of carving pumpkins! Not yet pictured, from the intentionally roasted galeux d’eysines squash: ricotta and pumpkin manicotti, pappardelle pie, and likely some sweet treats to come.
Let me know if you are interested in any of the above recipes, and I’m open to suggestions on what to do with the remaining 10 or so pounds of orange gold!
This is the first, but certainly not the last, of my odes to cruciferous vegetables. Part love note to cabbage (Brassica oleracea), a bit of food science and experimentation, and sort of a recipe.
Cabbage nutrition: 100 g (a heaping cup chopped) of cabbage will put you back 25 calories, mainly from carbohydrates including an impresive 2.5 g dietary fiber. Cabbage is an excellent source of vitamin C (just over 33% of DV), contains 1.3 g of protein, and a host of phytochemicals.1
If ever there were one really good, uninteresting fact about myself it is that I do not like vinegar. I’ve said for over a decade that pickles are my kryptonite. What a travesty when your burger and fries comes with a pickle atop the fries, rendering them soaked in pickle juice and inedible. We all have that one thing. This distaste expands to most condiments (ketchup, mustard, mayo, dressing), though my tastes have slightly evolved. I will eat balsamic vinegar because it is sweeter, goddess dressing is the only type I will use (though this is lemon juice based), ketchup is reserved for sweet potato fries (otherwise they are too sweet), and I do enjoy the sweet zucchini relish I can every year (apple cider vinegar in this one). However, one other exception continues to exist outside this rule.
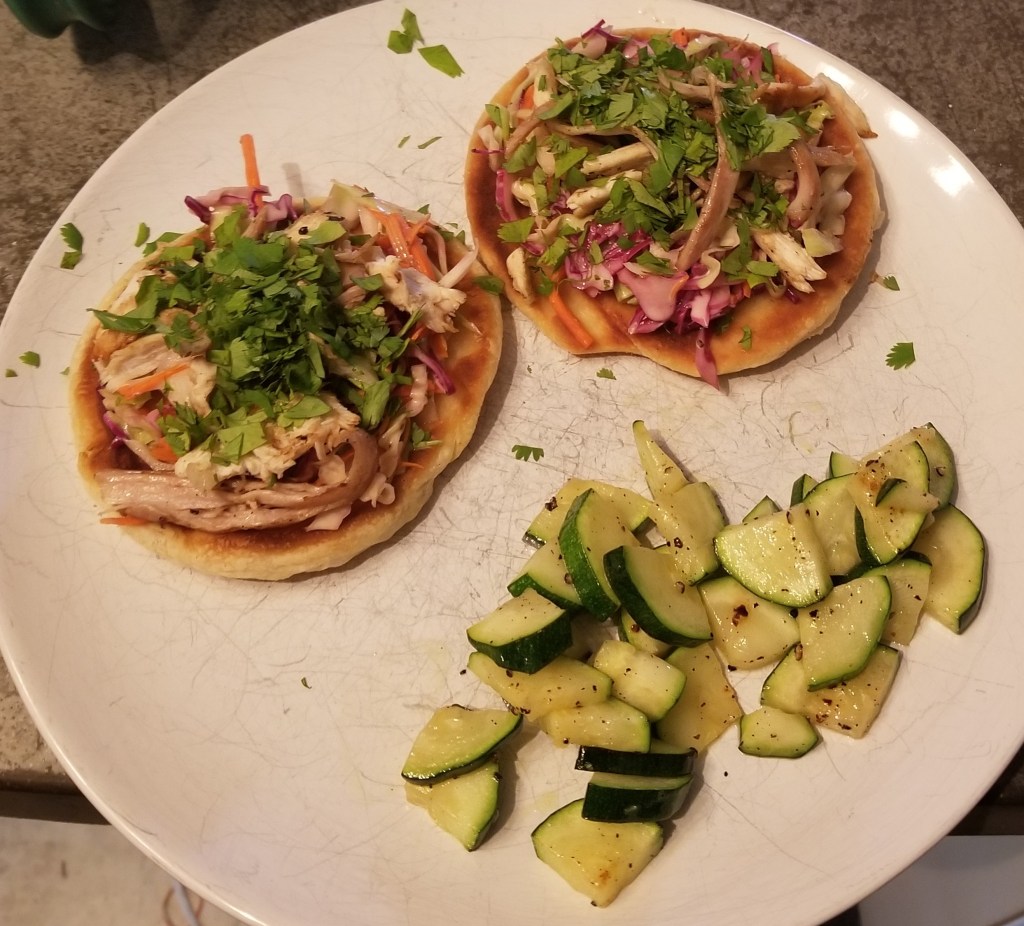
My love of coleslaw was born out of necessity. When I was staying with a German ex-pat in Belize for three weeks, the cheapest meal I could buy was fried chicken (a thigh and a drumstick), a homemade tortilla, and coleslaw. This dinner set me back about $4 and could usually carry me over to the next days lunch. I would cut my tortilla into quarters, strip some chicken from the bone and top it with coleslaw like an open-faced sandwich.
While it seems that pink/red coleslaw has found it’s place recently on some hip menus and it realistically doesn’t taste any different than it’s non-pink counterpart, sometimes you don’t want to eat pink food! After a bit of internet research, I found no good consensus on how to incorporate red cabbage into coleslaw without changing the overall hue. First, let’s look at why red cabbage turns coleslaw pink.
Plant foods (fruits, veg, legumes, nuts, and seeds) are full of antioxidants, but I’m sure you’ve heard that before. A group of these naturally occurring antioxidants are called phytochemicals, which are typically responsible for the rainbow colors of produce. Red cabbage is rich in anthocyanins and sulfur compounds – turning red in acid and blue in basic solutions. When cooking, red cabbage will usually turn blue; to mitigate this, add acid (vinegar, lemon juice, or fruit) to the pot to retain the red color. Red cabbage contains more antioxidants than its green counterparts, though green, chinese, and savoy cabbage have shown higher anti-inflammatory capabilities.2 That’s where this coleslaw comes in, best of both worlds plus some carotenoids from carrots for good measure and extra vitamin A.
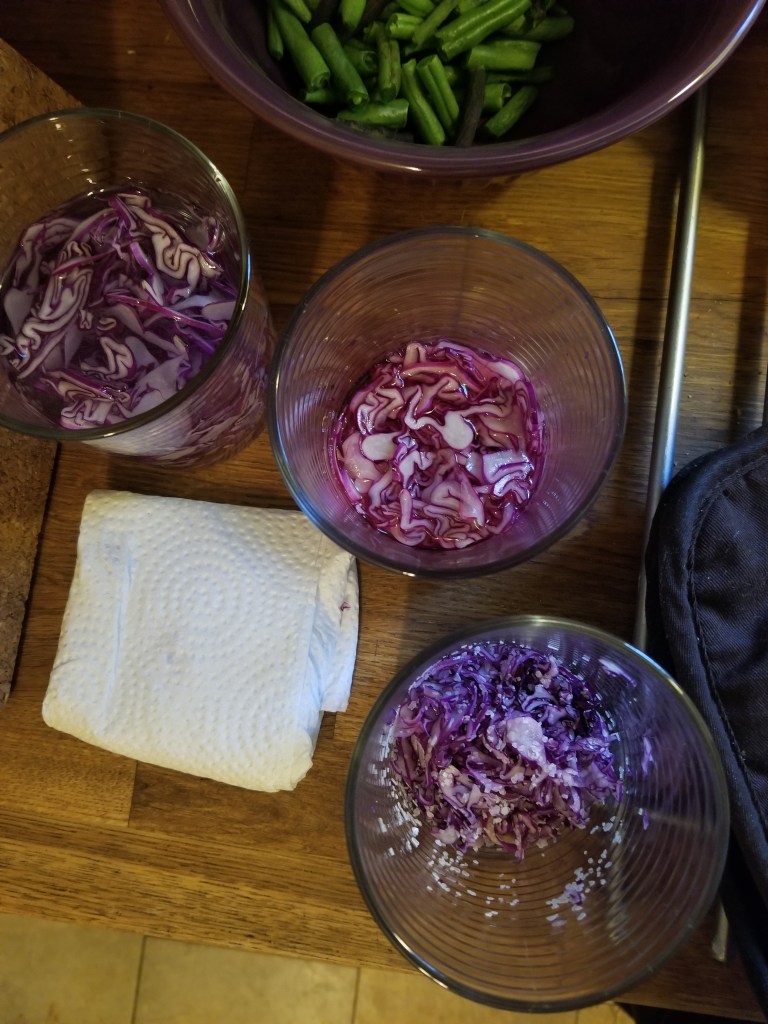
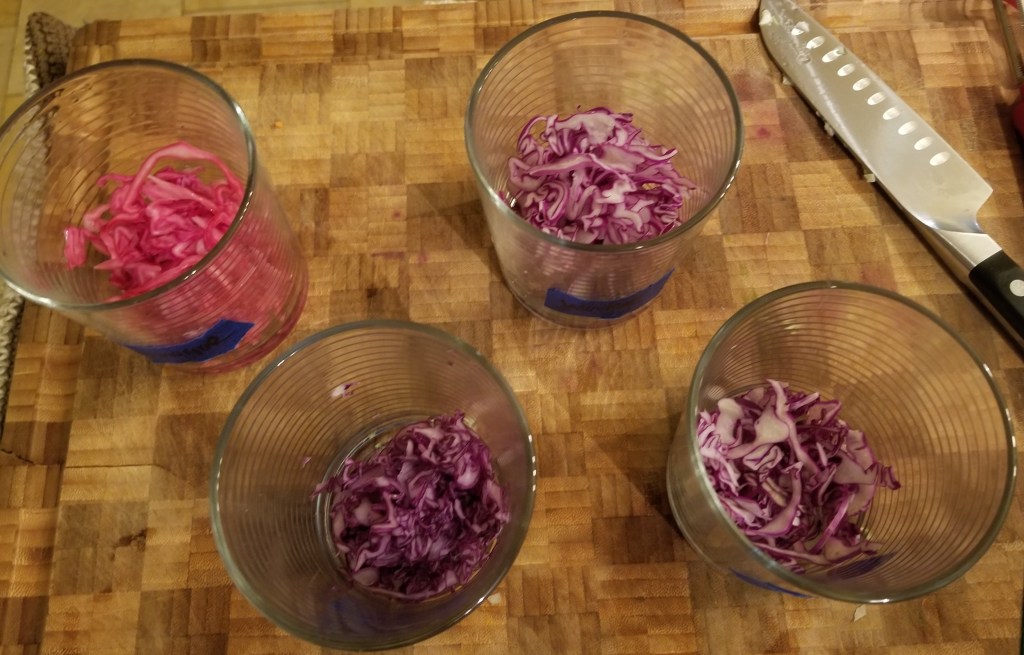
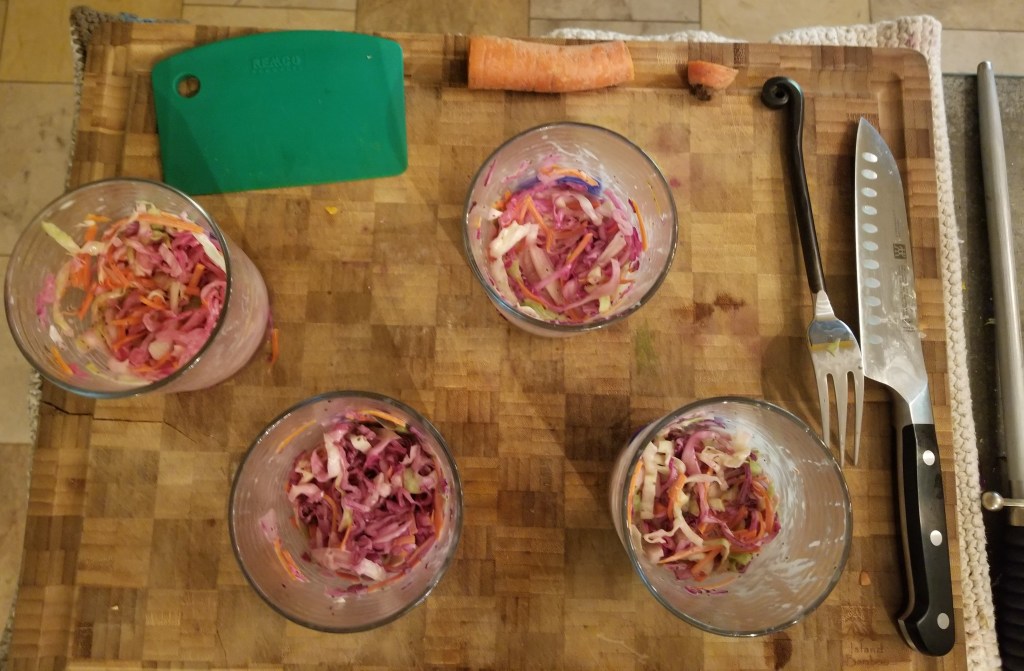
To avoid the leeching, color changing anthocyanin, I tried four methods.
Salted, dried, soaked in water, and soaked in white vinegar. I let these all set for two hours. You can see the vinegar began it’s work immediately. The hope here was that any of these techniques would be enough to pull out anthocyanins from the cabbage.
Left to right: vinegar, salt, water, dry.
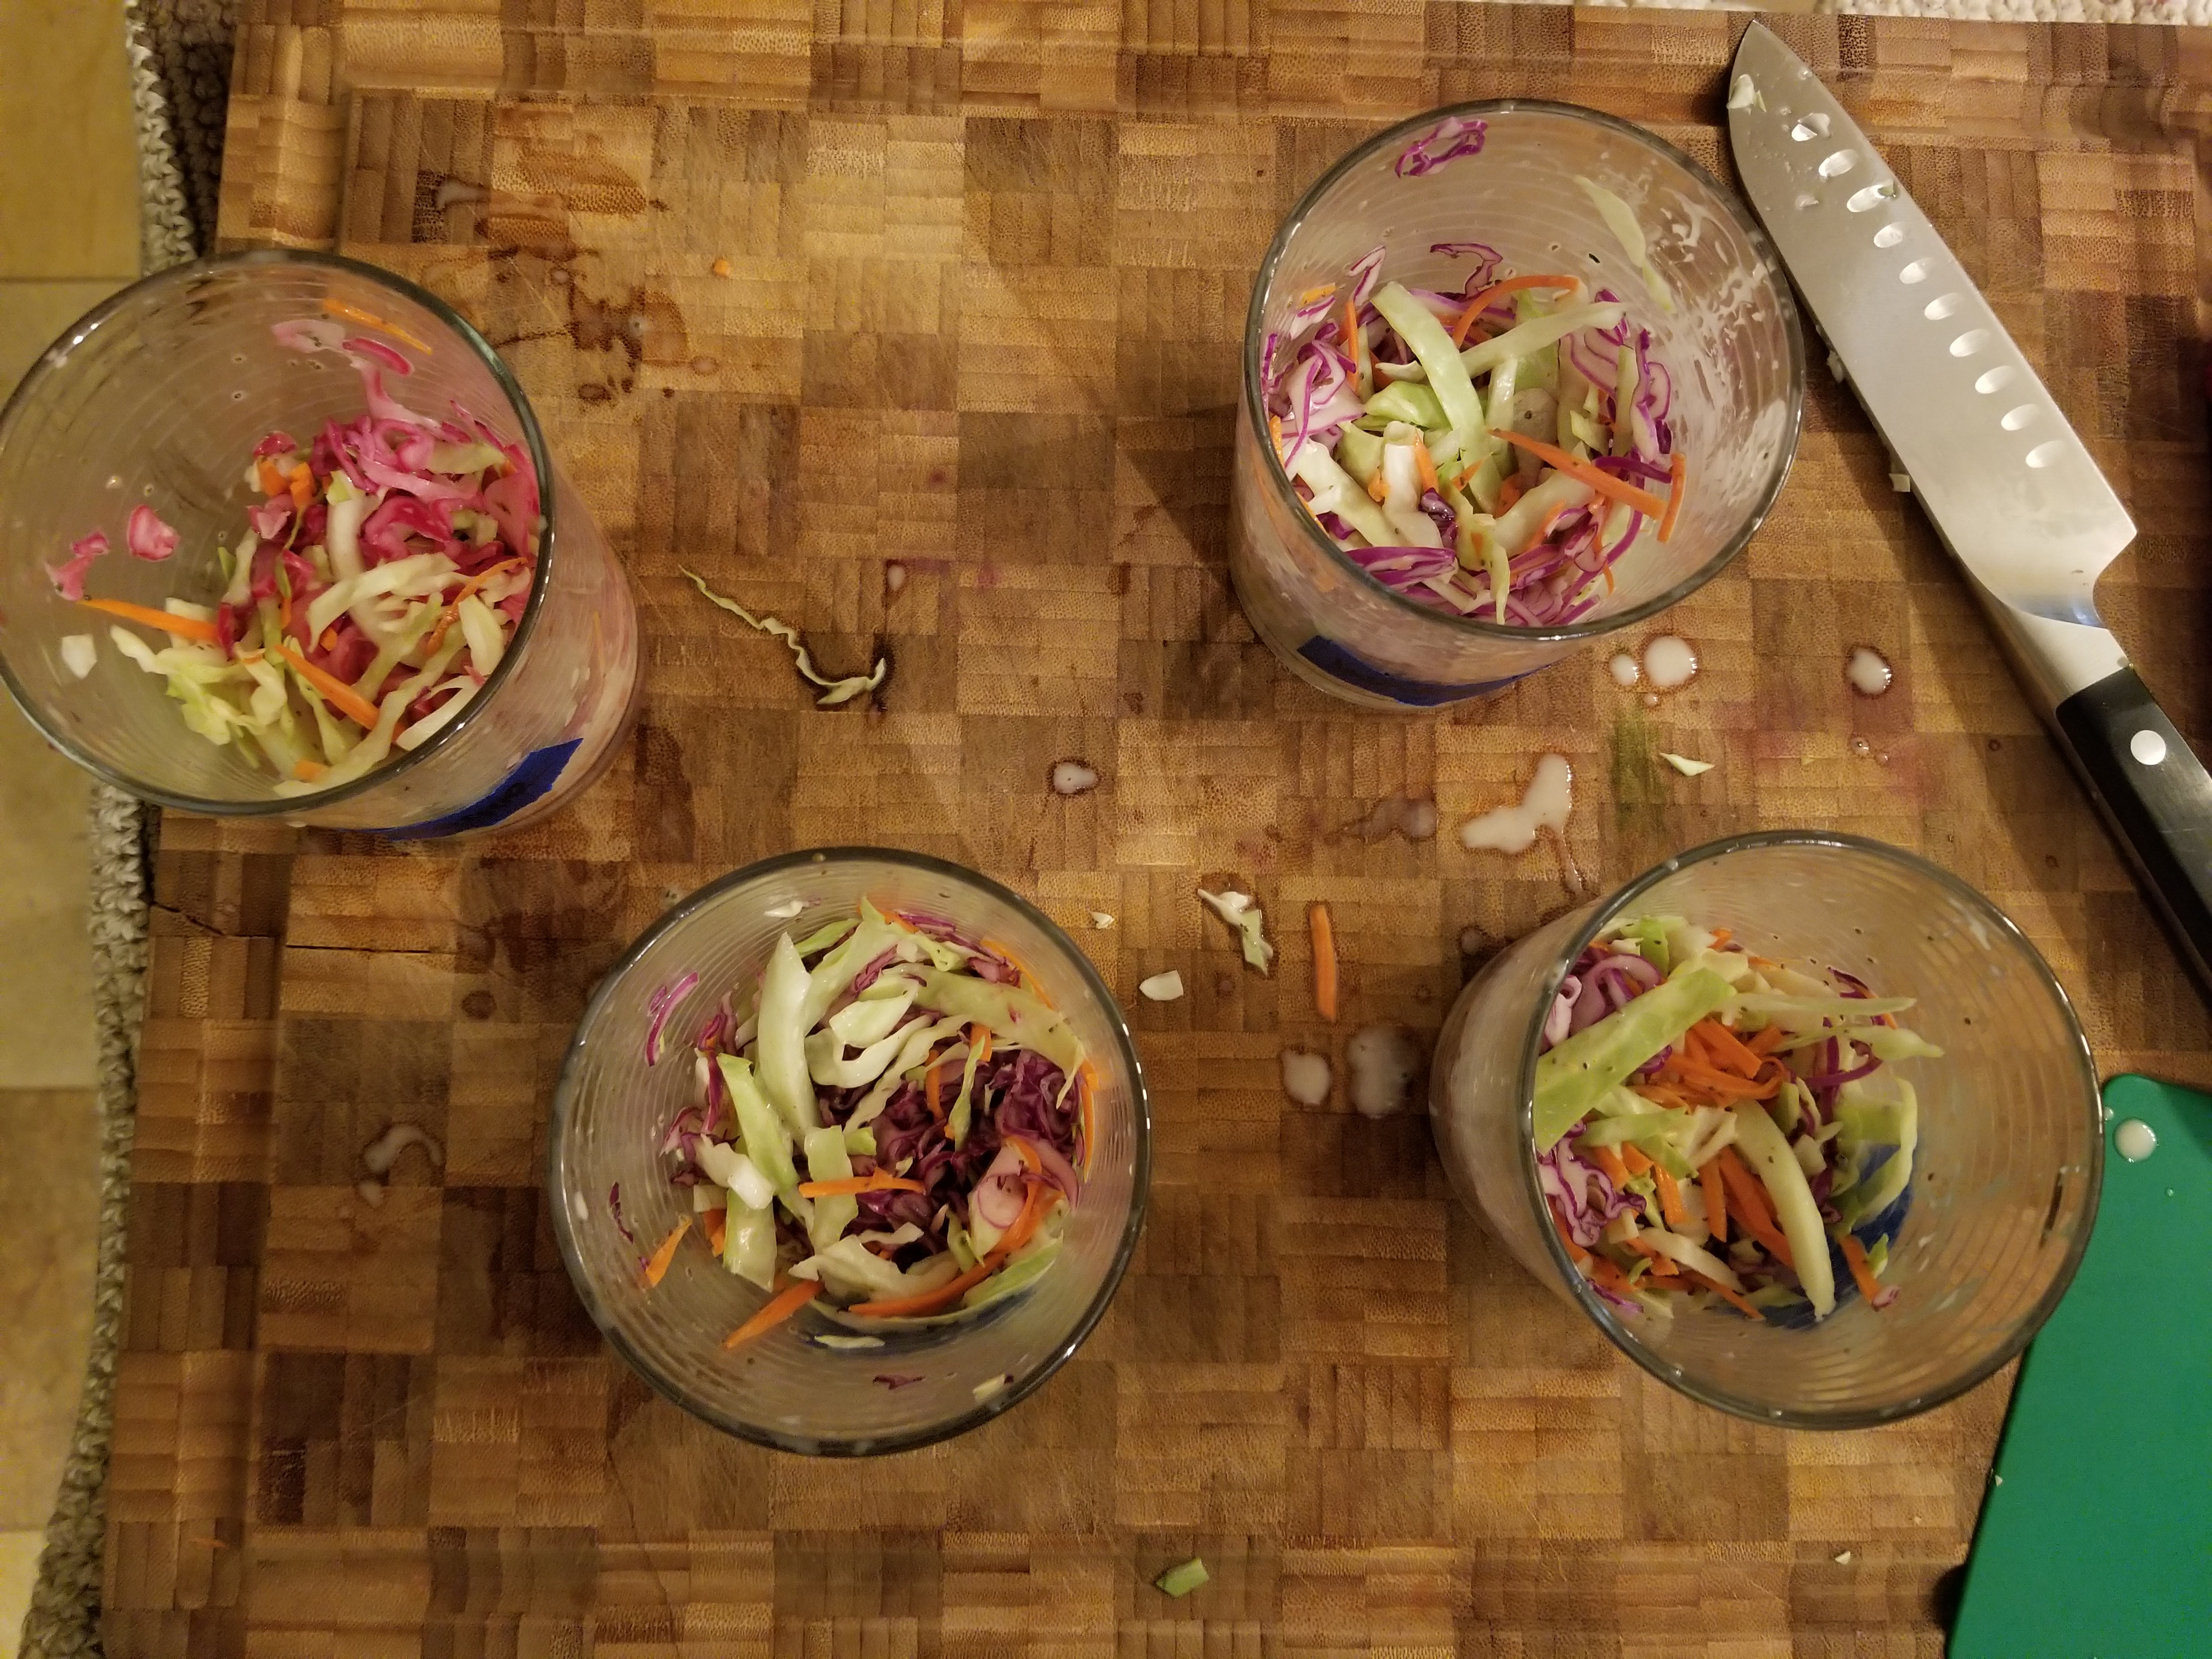
Prior to mixing with green cabbage, carrot, and dressing (mayo, white vinegar, cayenne, and celery seed*) I drained, rinsed, and dried each of the samples (except the dry, that one I kept… dry).
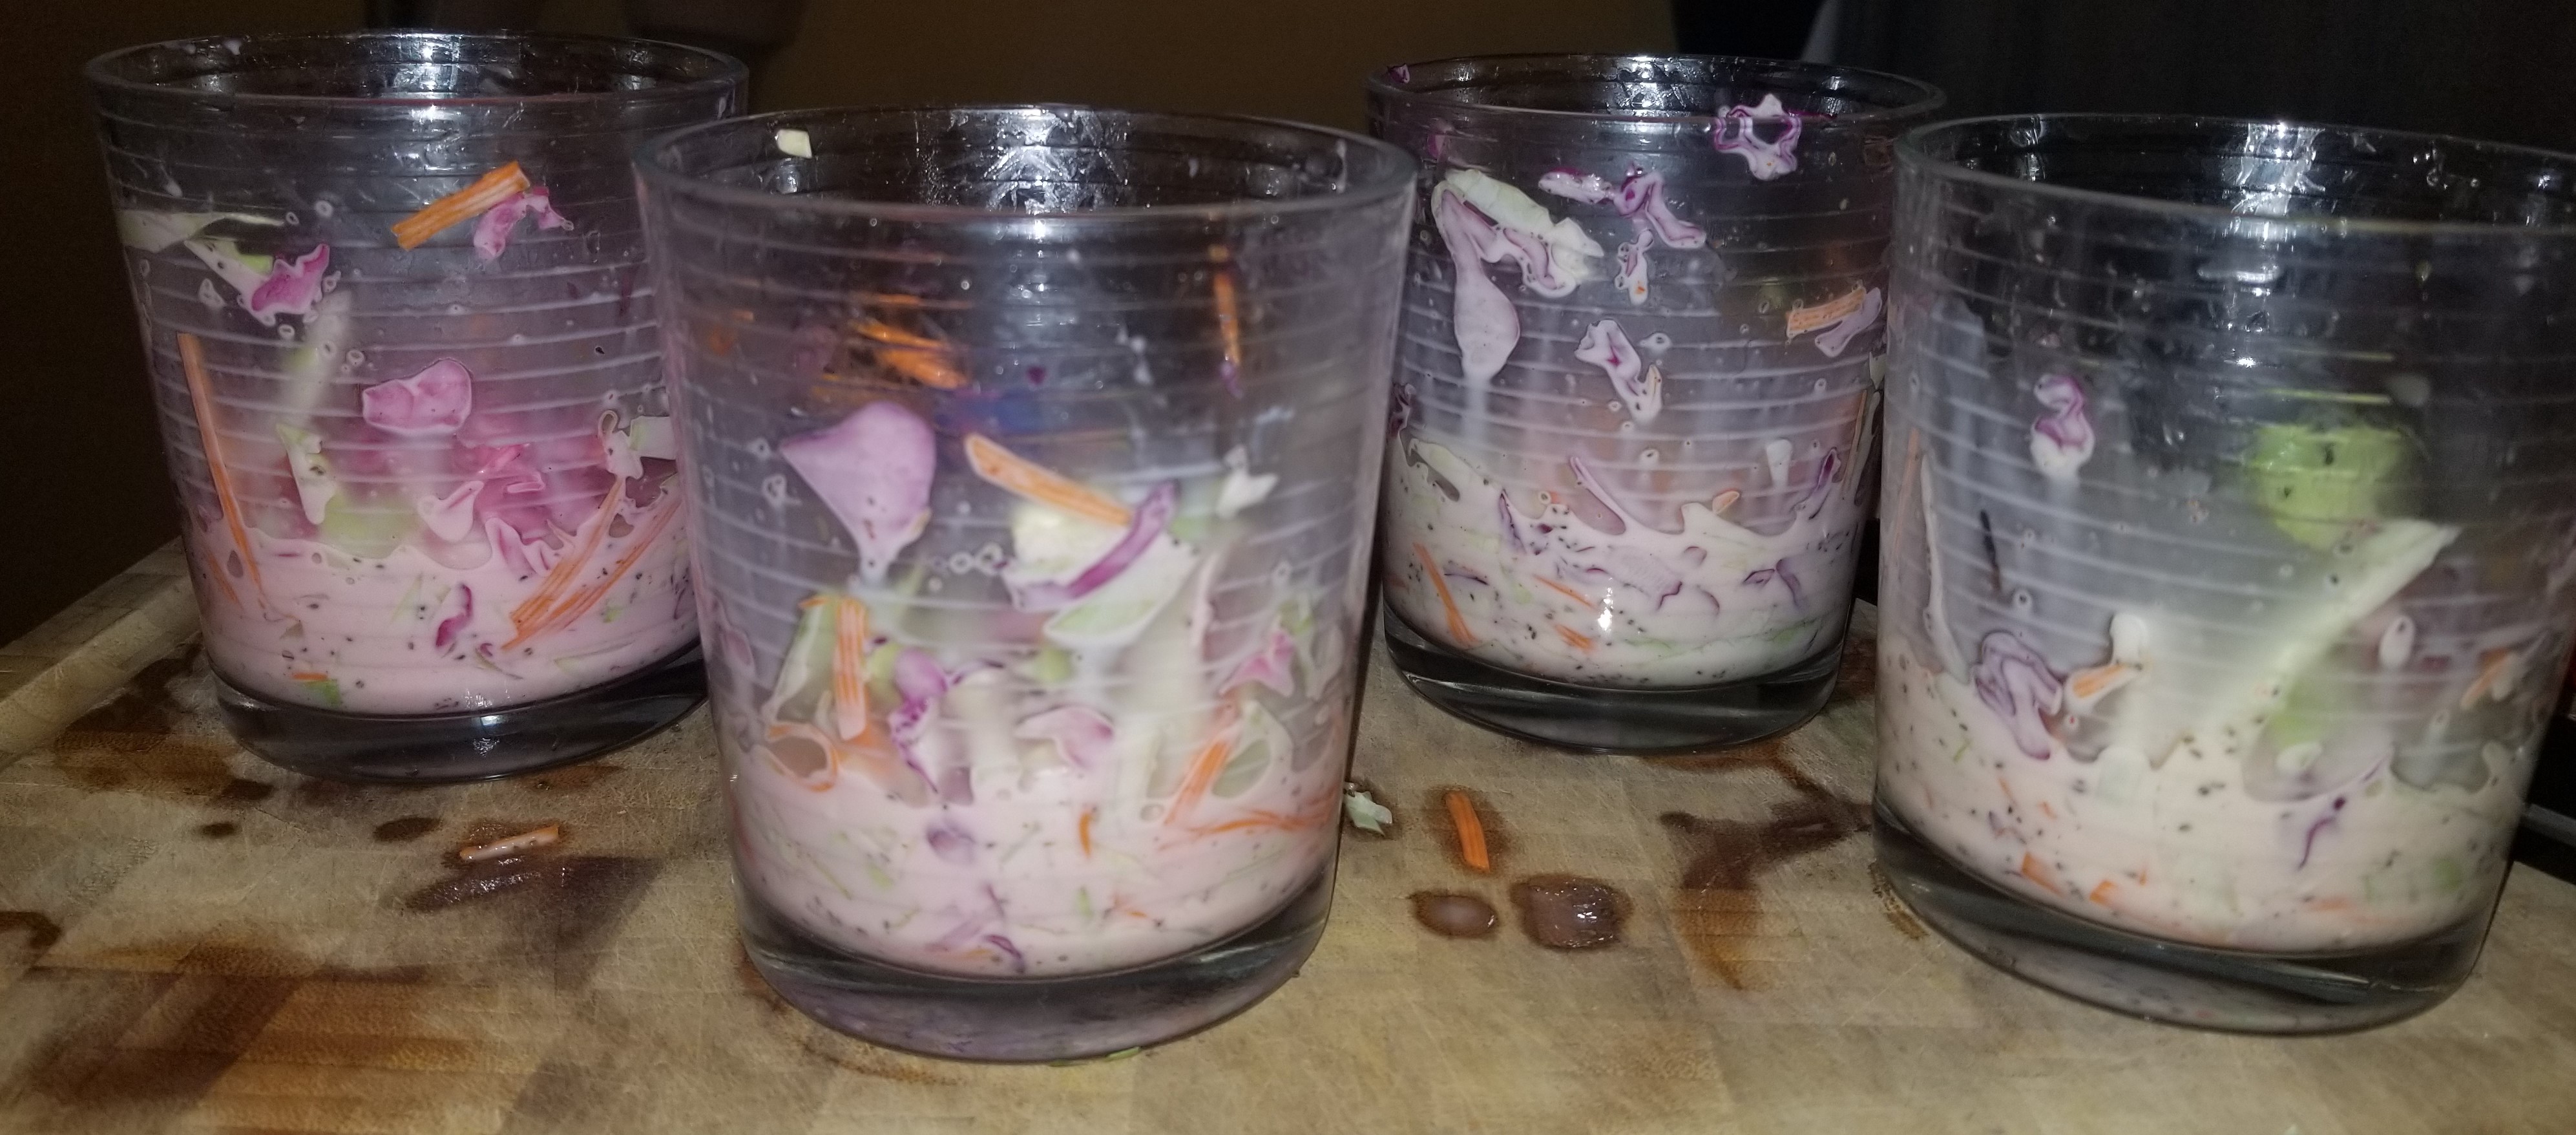
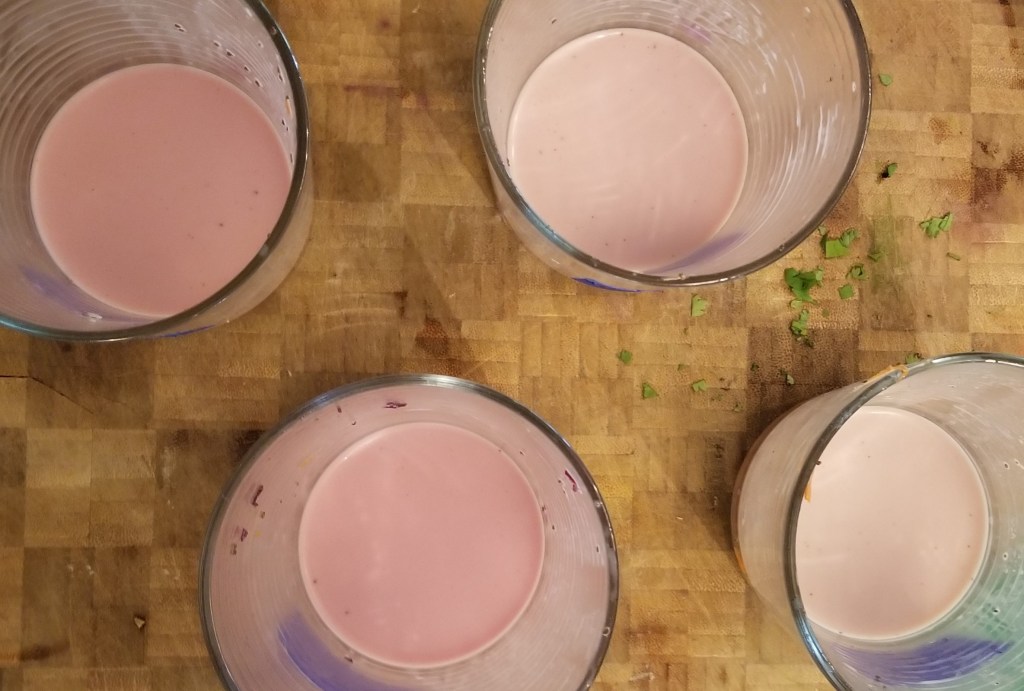
This is what each looked like after an hour in the fridge – without and with flash.
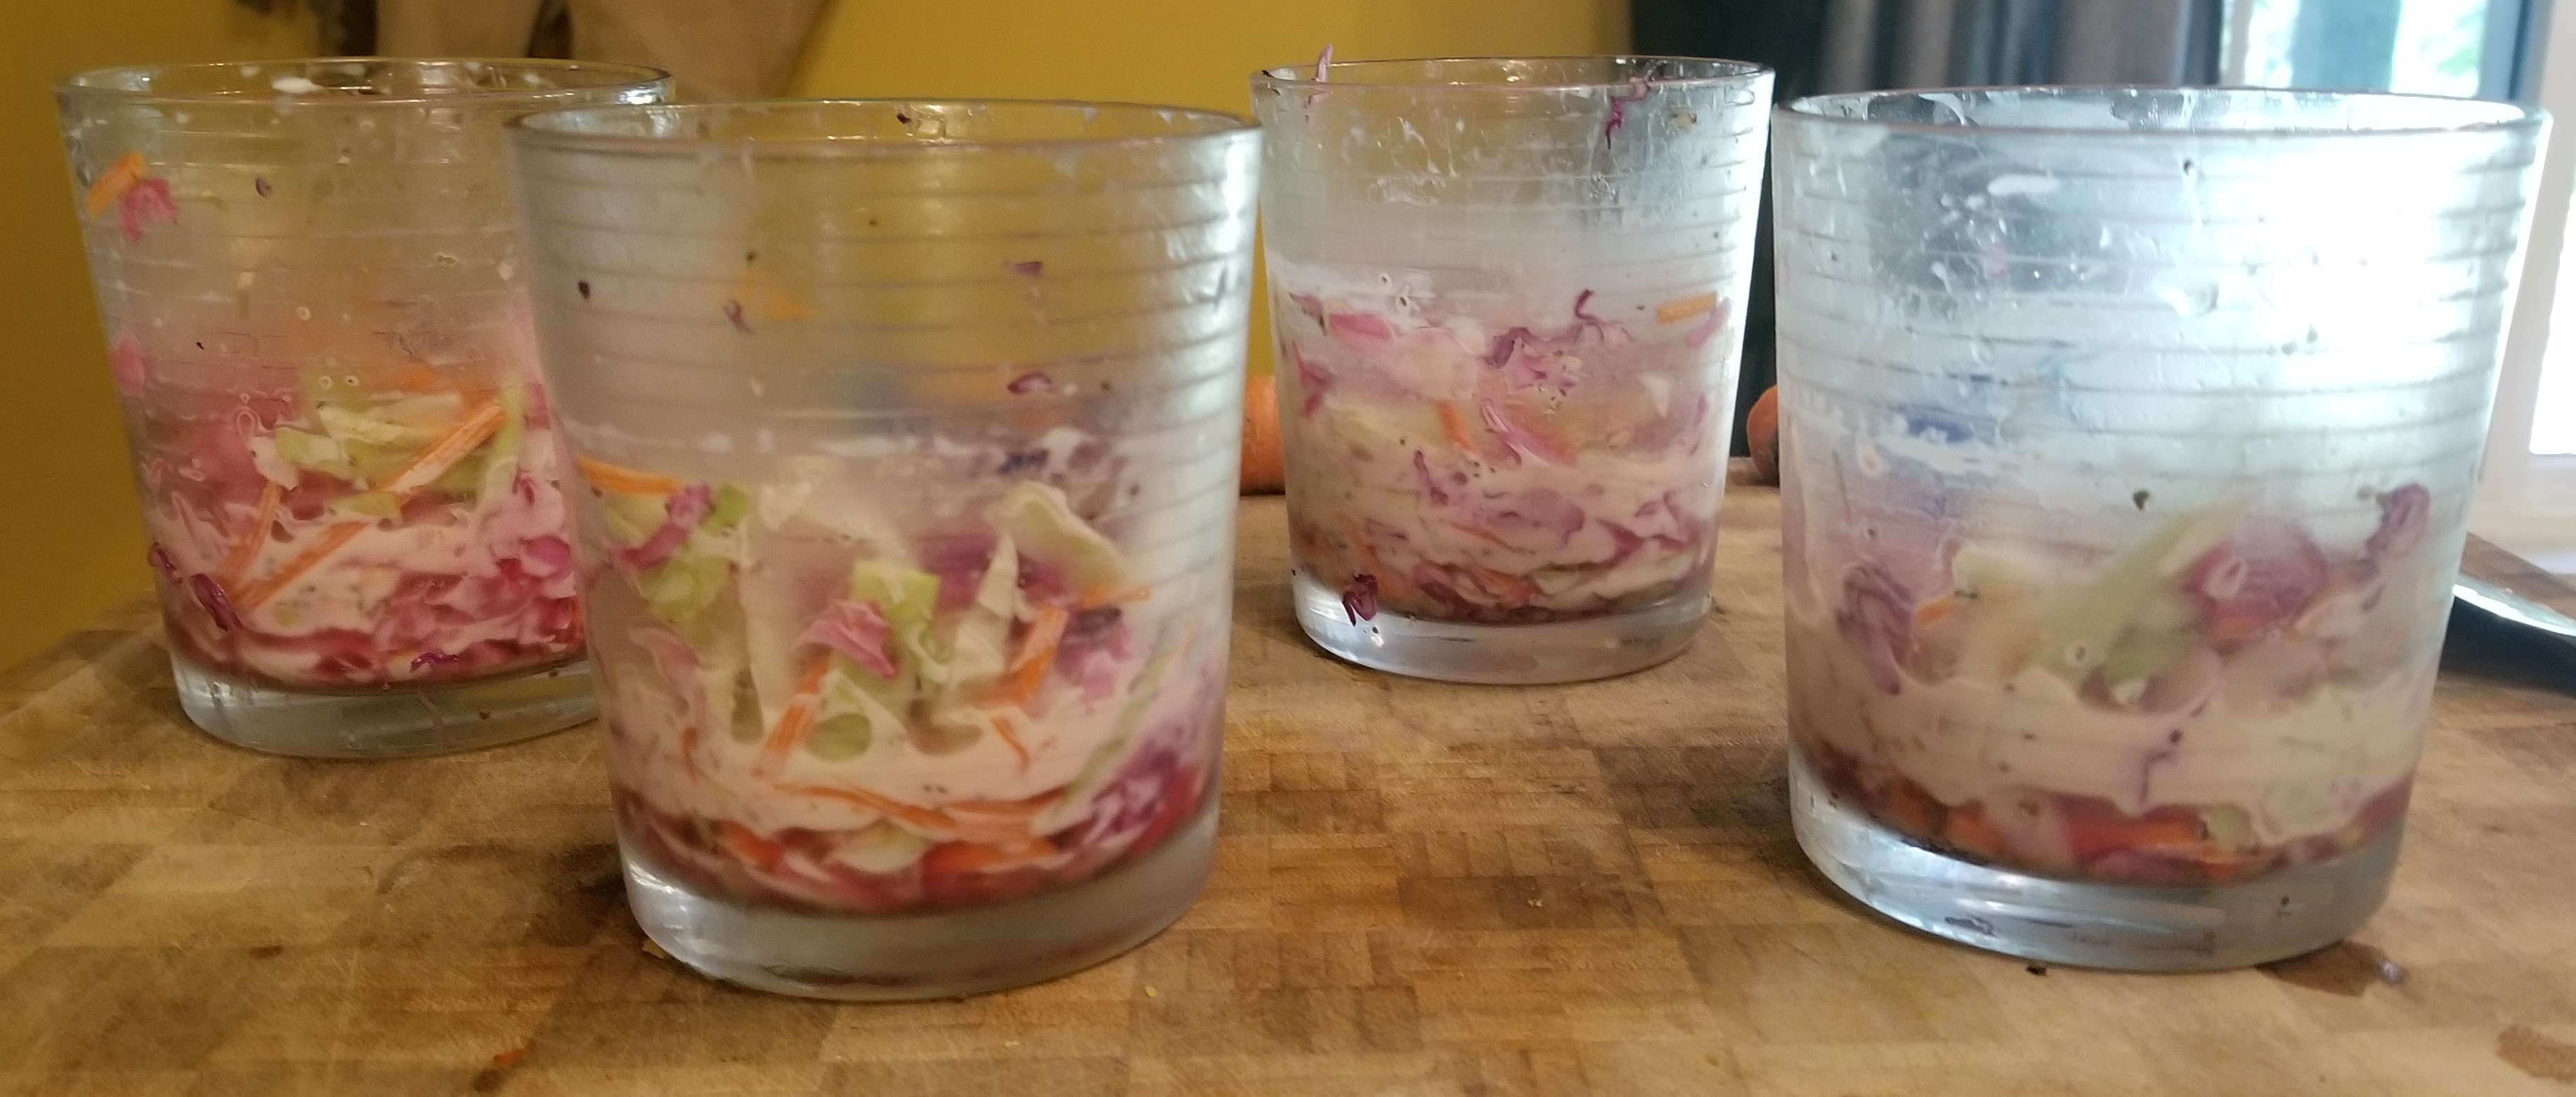
This is what each looked like after an overnight (12 hour) rest in the fridge, before and after stirring.
There was no real noticeable taste difference between any of the samples. I drained the liquid off (and combined all the samples for eating) to showcase the subtle difference in saturation and hue present in each. Still left to right: vinegar, salt, water, dry.
Lightly drawn conclusions: If you don’t want your coleslaw to be pink, don’t use red cabbage. If you have your heart set on using red cabbage, but want your coleslaw to be as non-pink as possible, I suggestion slicing your red cabbage, blotting with a paper towel, and leaving it uncovered in the fridge overnight to dry out. A further step to take is waiting to add the red cabbage until serving.
Conversely, for the pinkest possible coleslaw, I suggest using red cabbage in place of green and swooning at your neon culinary masterpiece.
*I prefer using apple cider vinegar, but my partner prefers white. If I’m making it for both of us, I default to white vinegar. We go real heavy on the celery seed in this household.
Cover photos are homemade coleslaw and pulled pork (homemade barbecue sauce and local pork), on a homemade wheat bun and homemade fried local chicken and coleslaw on homemade naan.
Rokayya S, Li CJ, Zhao Y, Li Y, Sun CH. Cabbage (Brassica oleracea L. var. capitata) phytochemicals with antioxidant and anti-inflammatory potential. Asian Pac J Cancer Prev. 2014;14(11):6657-6662. doi:10.7314/apjcp.2013.14.11.6657
Elevating a tried and true cold weather meal, the following recipe for Teriyaki Tofu Stuffed Acorn Squash will give you the opportunity to learn new skills, practice techniques, and master a new sauce for your arsenal.
Teriyaki Sauce – this will keep, unadulterated, for up to three months in the fridge.
soy sauce – any variety, any brand. Low sodium is fine. If you are gluten-free, soy is notoriously not, check the ingredients label diligently!
mirin – high sugar, low alcohol content rice wine. What I’ve been able to find easily is “aji-mirin” which is basically a cheap alternative, but it works!
dark brown sugar – yes, light brown sugar will work just as well, but I prefer the deeper molasses taste from dark brown sugar (always)
Combine the above in equal amounts. If you aren’t sure that you will like the final product, start with 1/4 cup of each and a very small sauce pan. Over medium heat, stir continuously until the sugar has dissolved. Bring the heat up to medium-high, stirring and scraping down the sides of the pot occasionally until it has come to a boil. Turn the heat down to medium-low and simmer, stirring occasionally until it has reached your preferred sauce consistency. Err on the side of too thick as the moisture from whatever you toss in your sauce will thin it.
This sauce can be dressed up with minced fresh ginger and/or garlic. Store leftovers in a lidded contained in the fridge. If you have added any ingredients beyond the initial three, I would recommend using leftovers within a week. I like to make a batch of rice at the same time as a base for quick and easy savory breakfast. Toss with some vegetables (raw, roasted, sauteed) and your favorite protein. You can even dress it up with a fried or soft boiled egg.
We are a household full of kitchen gadgets, but one thing we have so far gone without is a spiralizer. Maybe this dish would have been cuter topped with a vegetable nest, but these super easy matchstick veg can be made with the pokey side of your vegetable peeler. This goes for anytime you want matchsticks without the agony of hand cutting them, such as coleslaw. Use the peeler as normal, but pokey side to your vegetable. In this case, I used both carrot and watermelon (daikon) radish. After matchsticking, I placed the veg in a bowl covered with cold water and into the fridge. This keeps them crisp for days.
To roast acorn squash:
preheat oven to 400°F
halve squash from stem to tip, scoop out and discard the seeds and stringy goopy bits, and generously coat both halves inside with oil (olive, canola, or vegetable are fine) and sprinkle with salt and pepper.
place squash on pretty much anything oven safe with low sides, cut side up
roast, basting the squash with oil that has dripped off the edges into the “bowl” a few times, until the flesh is easily pierced all the way through with a fork.
** if you prefer not to use so much oil: lightly oil a baking sheet, place the squash inverted – cut side down – onto the baking sheet. This way, it will steam itself.
For crispy tofu:
This trick was learned through trial and error. While I LOVE fried tofu, I despise frying things. It takes a lot of oil, it’s messy, the clean up sucks, and me and the house smell like used oil all day. Yum… Instead, try this:
Start with extra firm tofu. If you have a tofu press, skip to the next step, if not: Remove from the packaging and dry with a tea towel. Wrap the tofu in a different tea towel, and then another fluffier towel. [note: any kitchen towels are fine, I like to use not fluffy ones for touching the tofu. If this makes you uncomfortable and lint-fearing, wrap the tofu in a piece of paper towel first before layering in cloth]
Place the tofu on a flat surface. Top the tofu with heavy stuff. Things I have previously used: multiple large cookbooks, bricks/stones, Kitchenaid stand mixer, bowl full of potatoes… use your imagination, but make sure the heavy things will not topple or if they do that they are not breakable. I like to use the back corner of my countertop where the weight can be supported on two sides by the walls. As the tofu settles, the weight will likely shift and may even fall off. Leave for 30 minutes up to two hours.
Remove weights and wrapping, and slice the tofu vertically into ~ 1/2 inch slices. Lay the slices directly on the rack of either a toaster oven or full size oven (depending on the spacing of the rails on your racks, you may need to finagle this a bit). Turn the heat on to 350-375°F and bake until evenly, lightly browned, approximately 25 minutes. Turn off the oven, prop the door open and let cool slightly before removing.
This crispy tofu will pair perfectly with the rice and teriyaki sauce awaiting you for breakfast. I like to eat it exactly as is or slice it further into strips for use in salads or wraps.
To beef up this stuffed squash, I sauteed some wilting bok choy, totsoi, and onions, which I tossed with the cubed, crispy tofu.
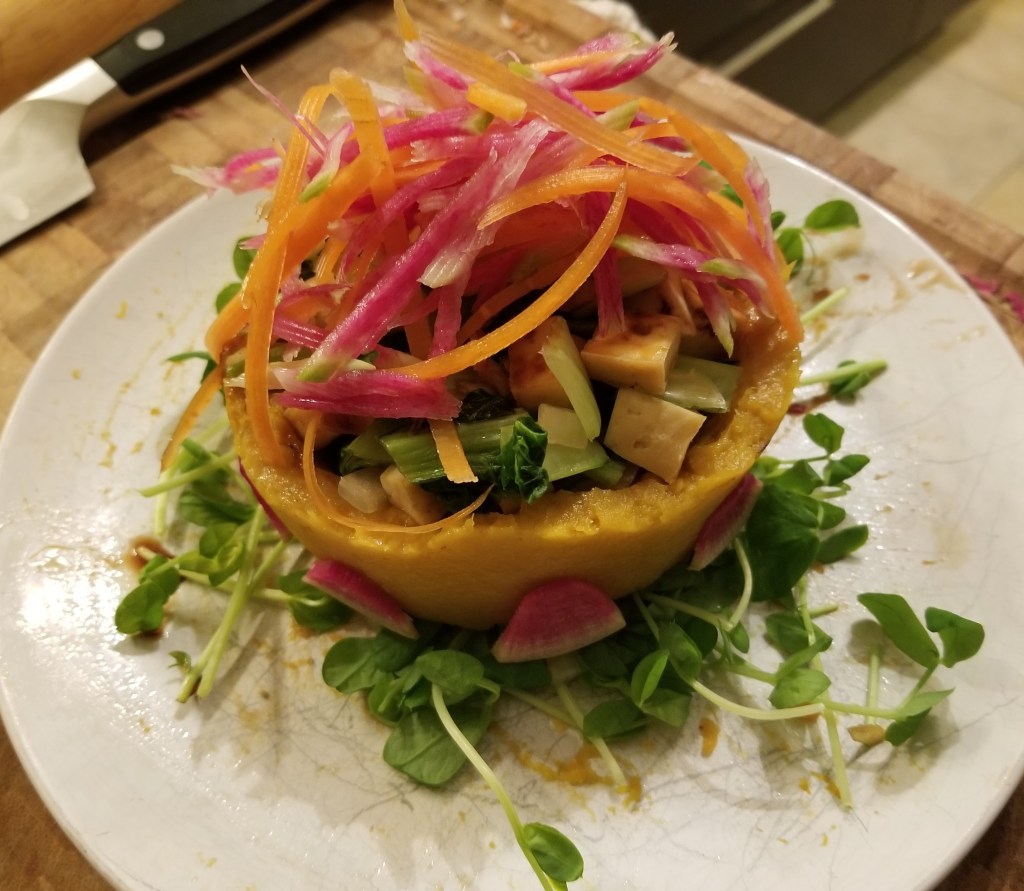
This can easily be served in the squash, as is, straight from the oven. To make it look fancier, I used a circular mold to create a roasted squash “bowl”, set atop some local pea shoots. I filled this with the tofu veg mixture, drizzled on some teriyaki sauce, topped with matchstick carrots and watermelon radish. The combination of different textures and flavors of seasonal, local vegetables was delightful and can, of course, be adapted with whatever you have on hand.
It appears my honeymoon with upside down food is far from over.
I became caught up on the idea that I needed parsnips for our Fall Feast meal. And really, I’m not sure why. I’ve never really liked parsnips that much, but it had to be. My purchasing option for local/organic + online/curbside was by the pound, so a pound of parsnips it was! This led me down the rabbit hole of parsnips recipes when I came across this dazzling gem from Bon Appetit. I used this Smitten Kitchen crust (lazily). The result had me drooling before it was even flipped.
Ingredients – 9″ pie dish, serves 8, 360 calories per serving
Crust:
1.25 c all-purpose flour
0.25 tsp kosher salt
8 tbsp butter (unsalted)
0.25 cup sour cream
2 tsp lemon juice
0.25 c iced water
Filling
1 medium (5 inch long) sweet potato
1 extra large carrot (purple dragon seen here)
2 small parsnips
1 small squash (approx. 12 ounces), Delicata
0.25 c olive oil (or canola oil)
salt, pepper, + garlic powder
0.33 cup sugar
2 tbsp water
1 tbsp rice vinegar (or white whine vinegar)
1 tsp each rosemary + sage
1 small red onion
1 ounce feta
4 tbsp shredded parmesan
0.50 cup shredded mozzarella
Preheat oven to 400°F, with your rack in the bottom 1/3 of the oven.
Begin by making the crust. In a large bowl, combine flour and salt. Cut a stick of butter hot-dog ways into four… smaller sticks. Dice these sticks and add to the flour. Use a pastry cutter (or your hands), until the largest chunks of butter are about pea size; make a well in the center. In a separate bowl, whisk together 1/4 c ice water + 1/4 c sour cream. Add 2 tsp lemon juice and dump this mixture into your well. Stir/fold until it just starts to come together. Roll out a sheet of plastic wrap. Use your hand to mash the “dough” into a ball, then flatten into a disk. Wrap tightly in plastic and refrigerate.
Meanwhile, maybe your oven is hot (mine was not yet). Rinse and pat dry all your vegetables. Grab a ruler or measuring tape (no joke). Cut carrot, parsnips, and sweet potato into 1/2 inch coins/circles/rounds. Cut the sweet potato last because it is the most likely to oxidize. Toss coins into a bowl. Trim the ends off the delicata, cut lengthwise in half, scoop seeds + goop into the compost. Slice into 1/2 inch thick half moons and toss into bowl. Coat with oil, salt, pepper, and garlic powder. Hopefully this took long enough to let your oven finish heating.
Spread the veg on a baking sheet, in a single layer, not touching (socially distanced veg roast more evenly). Roast ~15 minutes, flip, roast another 10-15 minutes until tender and lightly browned.
These need to cool a bit so you can handle them. After you pull them from the oven (please don’t turn it off like I did), begin to make your caramel. Yes, caramel.
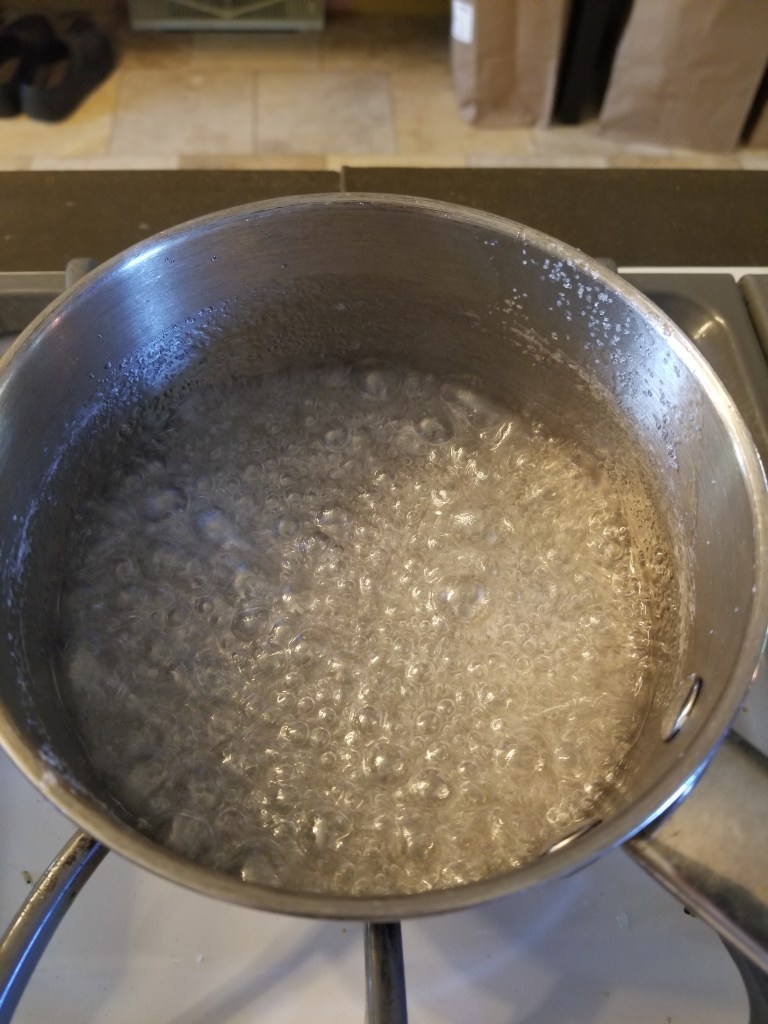
Into a small (no bigger than a quart) sauce pan add 1/3 c sugar and 2 tbsp water. Have your pinch of salt and 1 tbsp vinegar handy. Cook over medium-high heat, swirling occasionally. You may want to stir, but I don’t recommend it. Swirl and succumb.
You’re cooking this bubbling monstrosity until it turns “amber colored”. Don’t walk away. And have your pie tin handy and at least room temp. You may want to put it in the oven for a minute or two if your house is as cold as mine (65°F in the kitchen!).
Now comes the scary part!! To your amber colored, molten hot sugar water, throw in your pinch of salt and gingerly, from afar, the tbsp of vinegar. It will crackle and sputter and bubble and pop. Keep swirling. Quickly add this to your pie dish and and swirl around to coat. My pie tin was too cold and I was too slow so this part was unpleasant. I used a silicone spatula to spread it as best I could, but this caramel will harden in about 45 seconds.
Sprinkle the caramel with the rosemary and sage. Arrange your roasted root vegetables in whatever way is pleasing to you in a single layer. Use the smaller pieces to fill in any gaps. Mash things out of shape if you need to. Heck, even if you just want to.
Cut the red onion in 1/2 inch rounds, and “evenly” spread separated rings on top of the roasted veg. Top this with your three cheese mixture.
Remove the dough from the fridge, roll out into a ~12″ round, lay this on top of the veg/cheese and tuck the edges down into the dish. Stab with a fork, somewhat gingerly, but all over. And then a few more times for good measure.
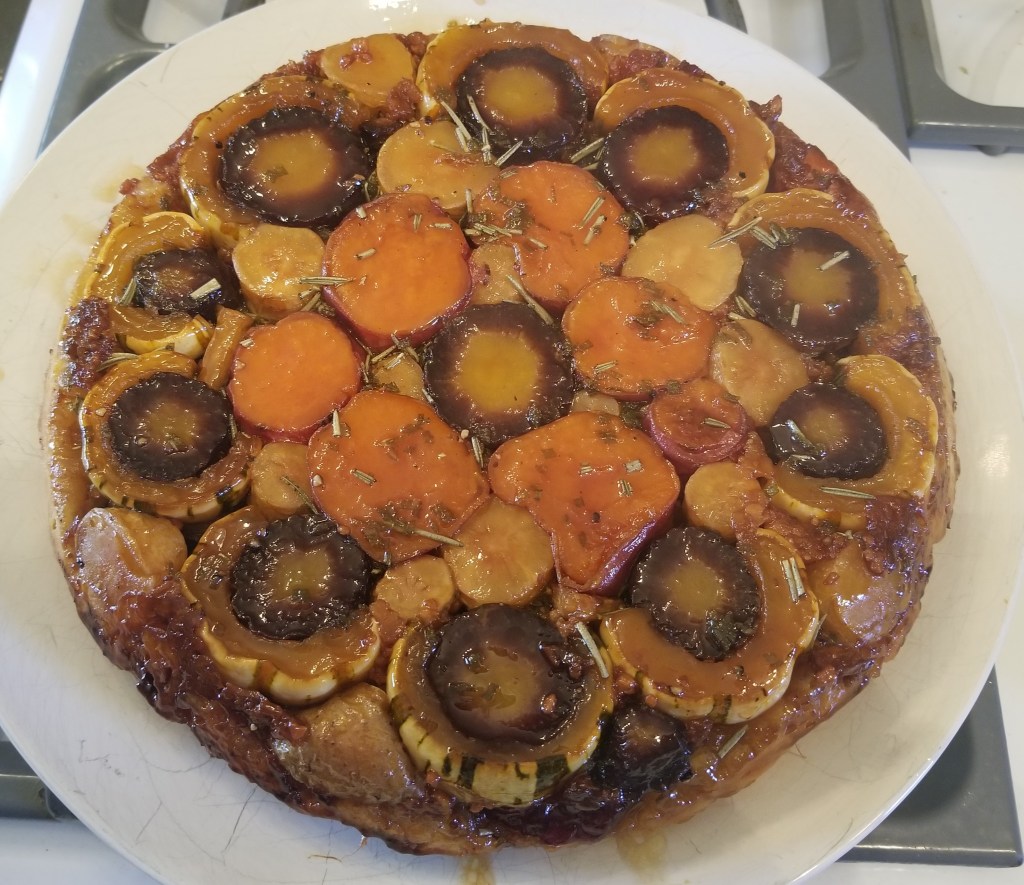
Bake for 20 minutes, then turn the heat down to 350°F for another 20 minutes. At this point, my tarte tatin was not as browned as I would have liked, so I broiled it on high for about 5-7 minutes. The caramel started bubbling up and over and I decided we were done. Remove from the oven, rest 5 minutes, then flip over onto a large plate.
This actually tastes at least as good as it looks. The vegetables are tender and creamy, the cheese has caramelized, and even after cooling the crust remained flaky and crisp.
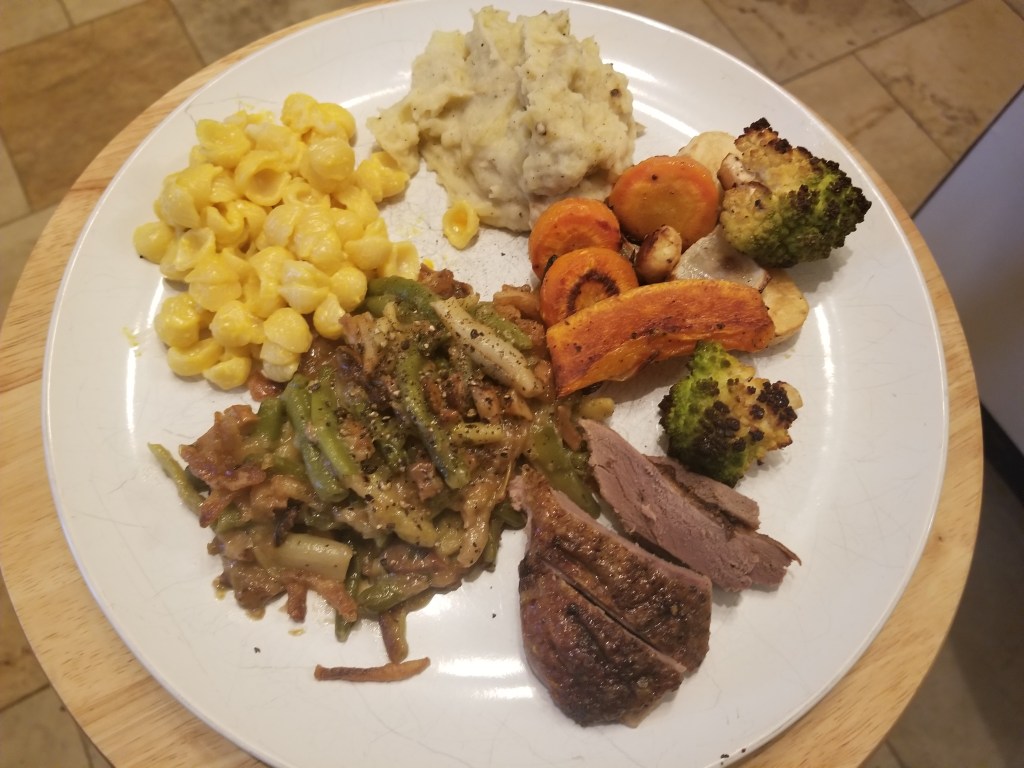
If you’ve made it this far, here are some bonus pictures of the mostly local, mostly organic Fall Feast we enjoyed.
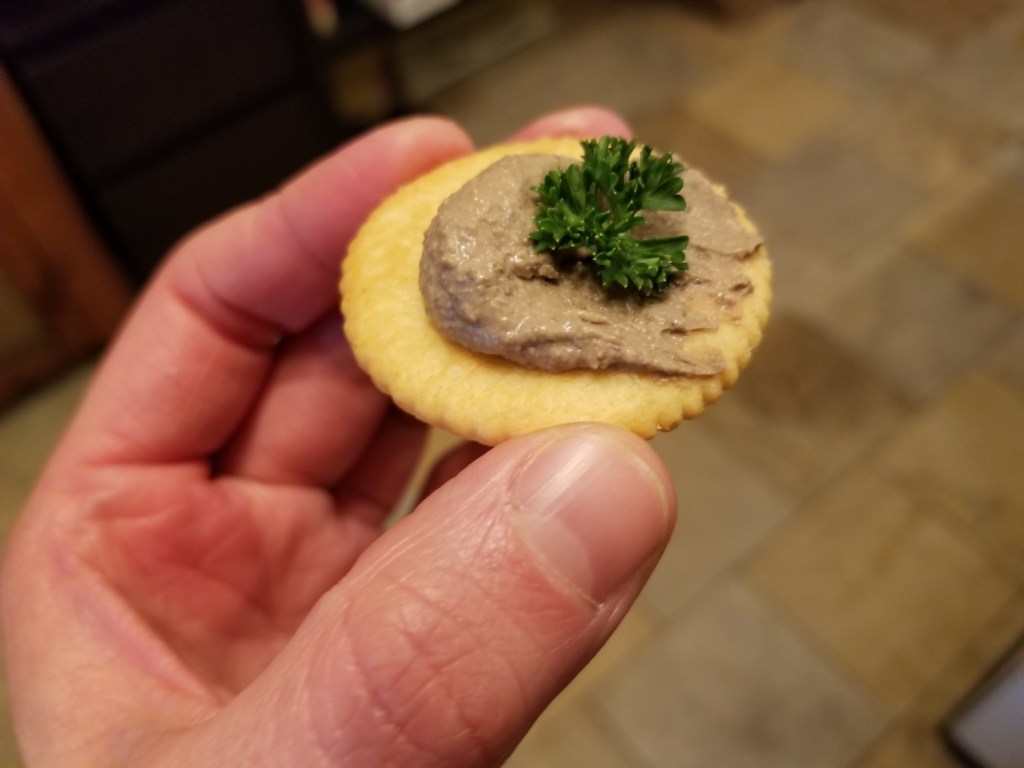
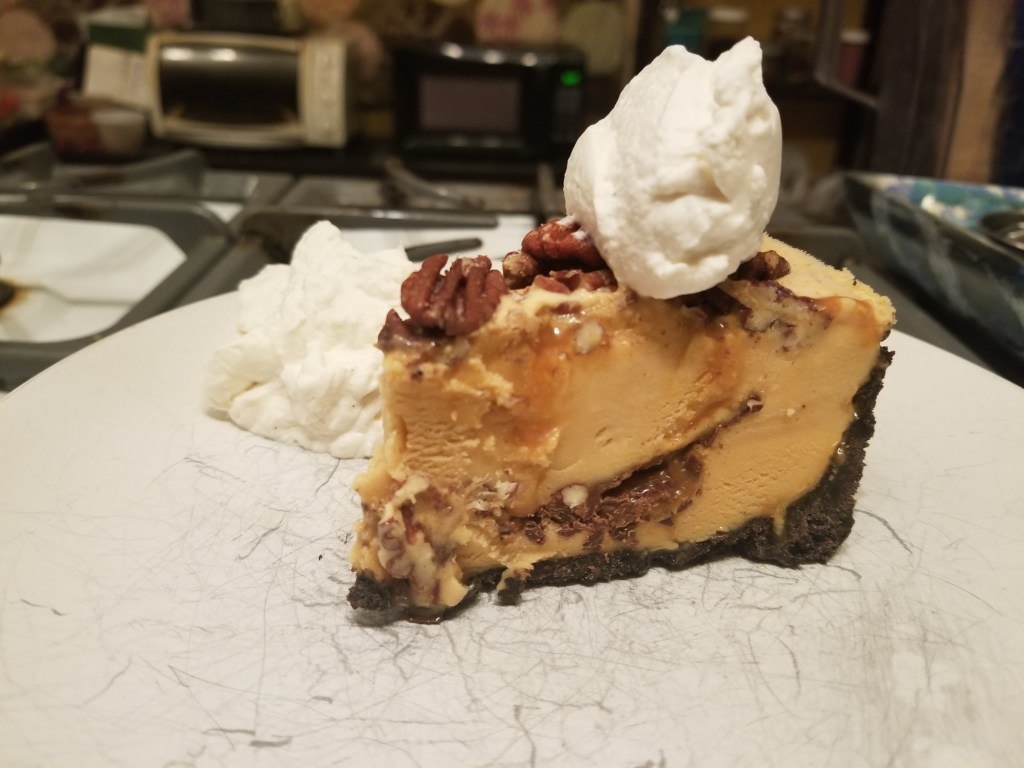
We got a muscovy duck from Webbed Foot Pines, which came with all its bits! This meant a duck liver pate appetizer. Then a sort of traditional feast of green bean casserole (my green beans and homemade cream of mushroom soup with chanterelles + hedgehog mushrooms from my dad), creamy mashed potatoes and roasted veg from Tantre Farm, Annie’s mac + cheese, and the most decadent bourbon caramel pecan ice cream pie from Go Ice Cream.
This might be the strangest year yet, but we are making sure to eat well!
Enjoy this latest recipe creation lightly adapted from Moosewood Restaurant. Keep scrolling to find the bloggy bit where I talk about jasmine rice and oyster mushroom heartache.
Ingredients for 4-6 servings:
1 13.5 oz can of coconut milk, divided
4 tbsp lime juice, divided
1 tbsp minced fresh basil
1 tsp minced fresh cilantro
1 tsp sugar
2 tsp canola oil, divided
3 small chiles, seeded + minced, divided
1 1/3 c long grain white rice
1 1/4 c boiling water
2.5 tbsp kosher salt, divided
1 red bell pepper
1 orange bell pepper
1 pint green beans
1 tbsp unsalted butter (optional)
1 tsp grated fresh ginger
2 garlic cloves
10-14 oz chanterelles, sliced into bite size pieces (or white oyster mushrooms)
First, bring 1 1/4 c water to a boil. While waiting on the water to heat, make the dressing by combining 1/4 c coconut milk, 3 tbsp lime juice, minced basil + cilantro, and 1 tsp sugar. Whisk vigorously ~2 minutes until sugar is dissolved. Alternately, you could combine all ingredients in a lidded container and shake vigorously for ~2 minutes.
In a medium sized (roughly 1.5-2 qt) lidded sauce pan (probably the one you usually cook rice in if you don’t have a rice cooker), heat 1 tsp canola oil over medium heat. Add two thirds of you minced seeded chiles and 1 1/3 c long grain white rice (jasmine works too), stir in with the hot oil and continue stirring and cooking over medium heat for 1-2 minutes–the chiles should start to be fragrant. Add the 1 1/4 c boiling water, 1/2 tbsp kosher salt, and 3/4 c coconut milk. Stir and bring to a boil uncovered over high heat. Once boiling, cover and reduce heat to lowest setting. Cook for 15-20 minutes until the liquid is completely absorbed and rice is fully cooked. Fluff with a fork and set aside.
While the rice is cooking, bring a few cups of water to boil in a large lidded pot. Slice bell peppers into 1-2″ long batons and cut green beans into simliar sized pieces. Once the water is boiling, add 1 tbsp kosher salt and sliced bell peppers. Return cover and boil 1-2 minutes. Remove peppers with a slotted spoon and place in serving bowl. Once the water has returned to a boil, repeat the process with the green beans, starting with adding another tbsp of salt. [The dish can be served hot or cold, and I think this lazy blanching without an ice bath is so nice].
Add the remaining tsp of canola oil to a pan over medium heat. Add the remaining minced chiles, ginger, and garlic, cooking 1-2 minutes until fragrant. Add the optional 1 tbsp unsalted butter and mushrooms. Saute mushrooms over medium heat until softened and lightly browned. Add the remaining tbsp of lime juice and toss to coat. Freeze remaining leftover coconut milk for up to three months.
Two options to serve: combine all vegetables and serve alongside coconut rice drizzled with dressing. Equally as good, but slightly less visually pleasing: combine rice and vegetables, toss with dressing and enjoy. Optional (but you probably should) toppings include microgreens and crushed cashews.
The chiles I used are called lemondrops. I purchased them last year at a farmer’s market in Madison, WI. The vendor told me they were not heirloom, but I saved the seeds anyway to see what would happen. To my delight, they are such beautiful and productive plants! Hotter than a serrano, thin fleshed, bright yellow when ripe with a slightly citrus aroma.
Another decadent option would be to roast either one or both of the bell peppers for a subtle flavor, textural, and visual change. I roasted one of the peppers the first time I made this and would absolutely do it that way again.
This makes a very rice forward dish, which is great for cooking on a budget or feeding a large crowd. Personally, I prefer a higher vegetable:rice ratio, which is why I added sauteed zucchini to my leftovers. As always, feel free to experiment. Increase the amount of listed vegetables. Add more vegetables: leafy greens (spinach, chard, or kale), onions, broccoli, bamboo shoots, water chestnuts, or sprouts would be great here. Seasonal variations could include swapping in peas and asparagus in the spring time.
To increase protein content, but keep it vegan I would use either extra firm tofu or tempeh with this dish. If that is not a dietary concern, baked chicken, pork, or salmon would be my top choices.
Mushrooms are one of very few sources of dietary B-12 not derived from animal products. B-12 is an essential vitamin that is involved in metabolism and energy pathways. For more information, check out the NIH.
We ordered a CSA for the week, that upon pick up came with a free 12 oz of white oyster mushrooms! I was too excited about free food to remember where they came from, but they were definitely foraged, not commercially grown. Having this addition to our box is what led me to this recipe idea. My heartache with this dish began when my curbside grocery pick up order did not include the jasmine rice I bought just to make this. It probably would have enhanced the flavor a little bit, but we did not miss it. The second heartache came when the entire dish was prepared except for the mushrooms. When I went to cut into them, I realized they were full of holes. Burrowing holes. Having grown up with a father who loves mushroom hunting, I knew what this meant before I cut in. I thought, “Maybe it’s okay. Maybe it is just a little bit.”
It was not a little bit. It was a whole lot of large squiggly… fly larvae and I’m horrified for whoever else received this “gift” without knowing it could be a possibility. Luckily for me, my partner reminded me we had frozen mushrooms my dad had previously gifted us. A sandwich bag of chanterelles saved the day! This is especially pleasing as they are the only mushroom I would choose to eat. [Free is my favorite flavor, which is why I was willing to give the oyster mushrooms a spotlight].
Let me know if you try this out or what other changes you think would be good!