Tahini lemon goddess style dressing

This recipe features wild onions grown on our farm!

With rising grocery costs, sometimes it makes sense to produce your own version of pantry staples. There’s pretty much only one kind of dressing that I like, which around these parts is over $5 a bottle… and I’ve never met a dressing that I liked that much. Luckily, it is easy to throw together with other pantry staples I always have around.

This recipe is super easy to substitute what you may have on hand – I’ll put a reference list at the end!

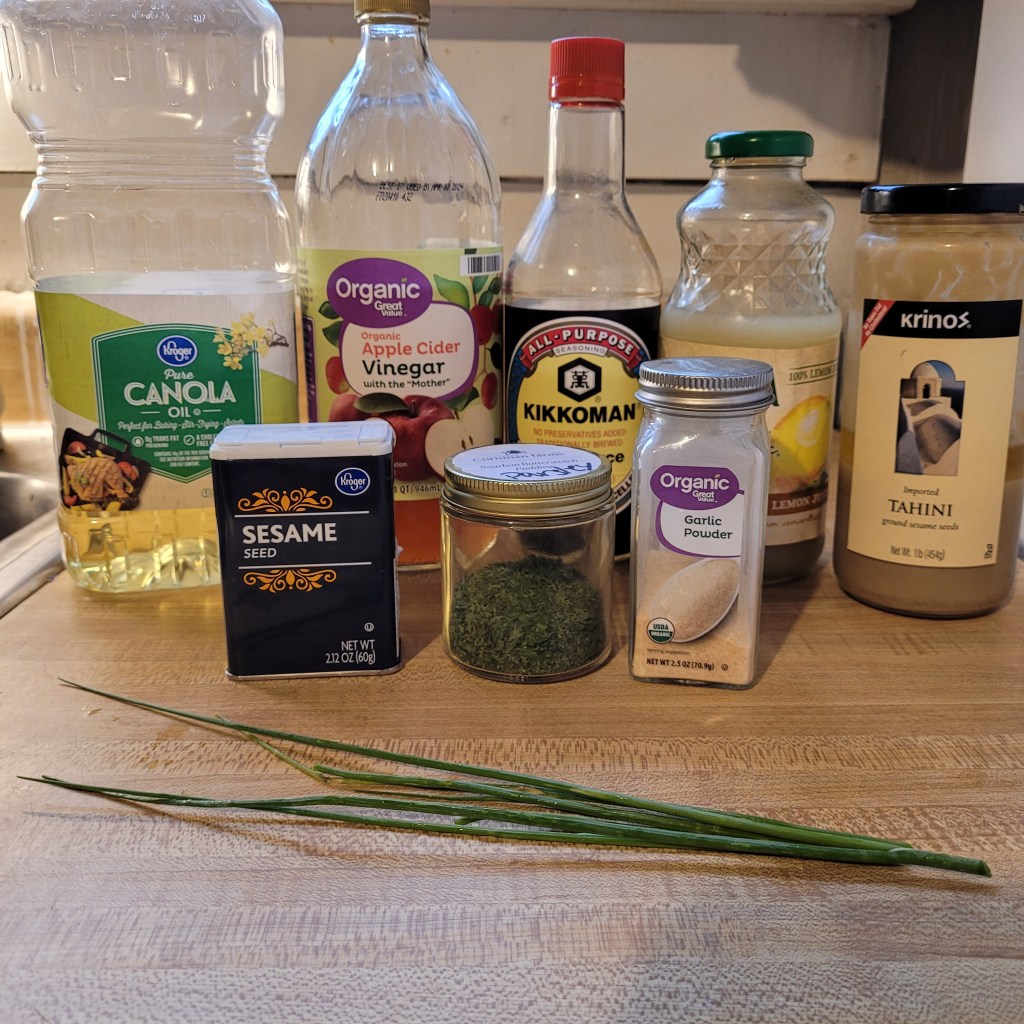
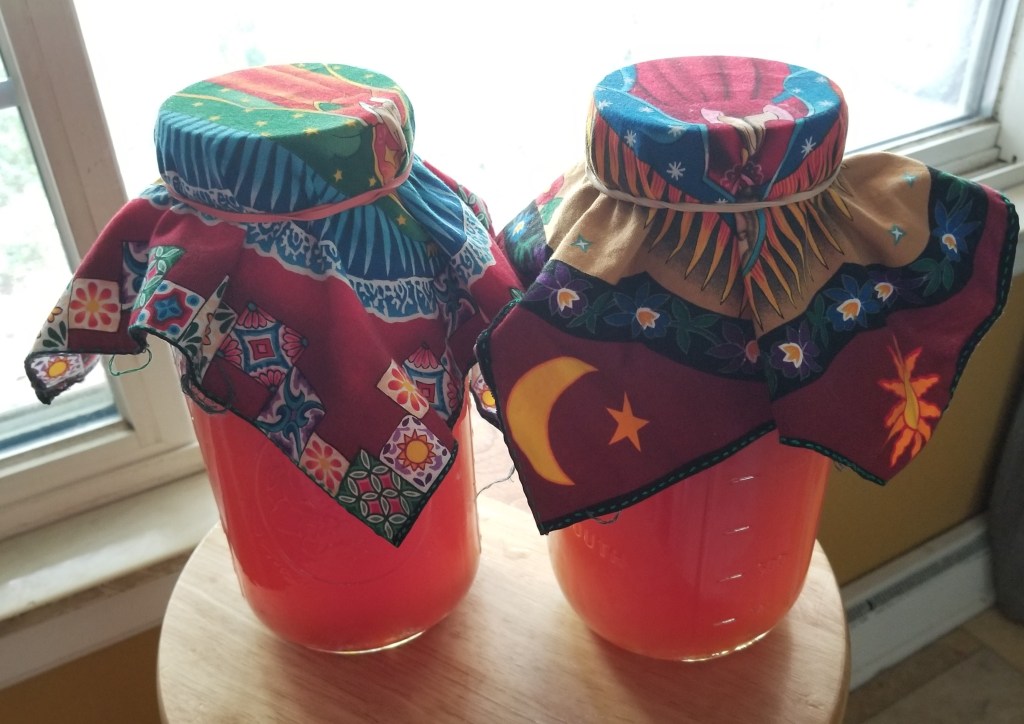
Please note: the above photo is not a brand or product endorsement, these are simply the actual items I currently own.

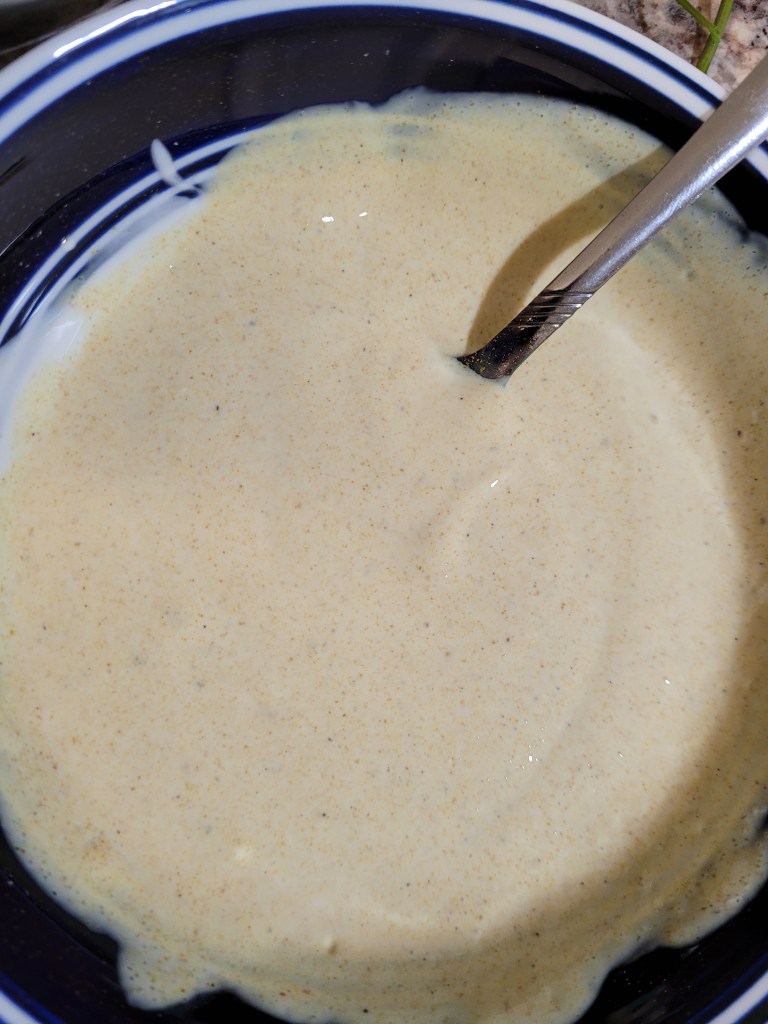
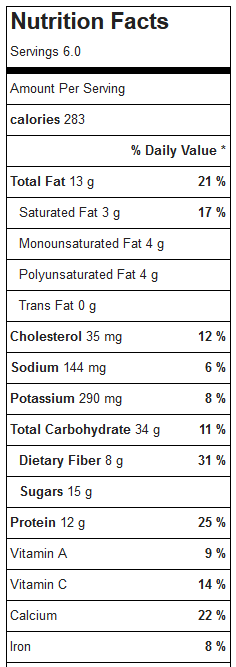
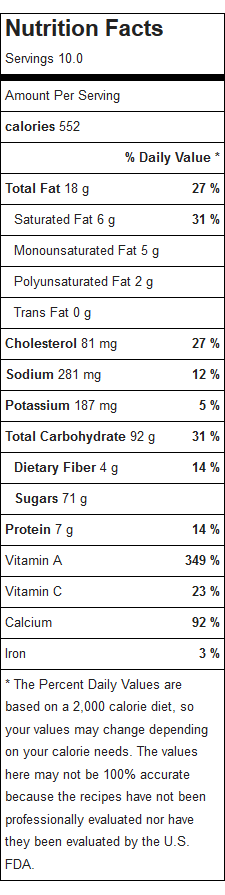
Tahini Lemon Dressing – makes approximately two cups (about 16 servings of 2 TBSP)

Ingredients

  • 1/4 cup canola oil
  • 3-4 TBSP tahini (thick – see notes)
  • 2 TBSP apple cider vinegar
  • 2-3 TBSP lemon juice
  • 1 tbsp soy sauce
  • 1 tbsp minced wild onions
  • 1 tsp garlic powder
  • 1 tsp sesame seeds
  • 1 tsp dried parsley

Really, really, really finely mince your wild onion greens. Make the tiniest circles possible. I like to cut them on a bias to be “fancy”.

No specialized equipment necessary for this recipe. I put it all in a 4 cup measuring cup and whisk until combined. Give it a taste and adjust any ingredient you see fit. If the texture/thickness is to your liking, you’re done! I typically add a tablespoon or two of water to get it how I like it. Put it in a container of some kind and use immediately or refrigerate.

A few notes:

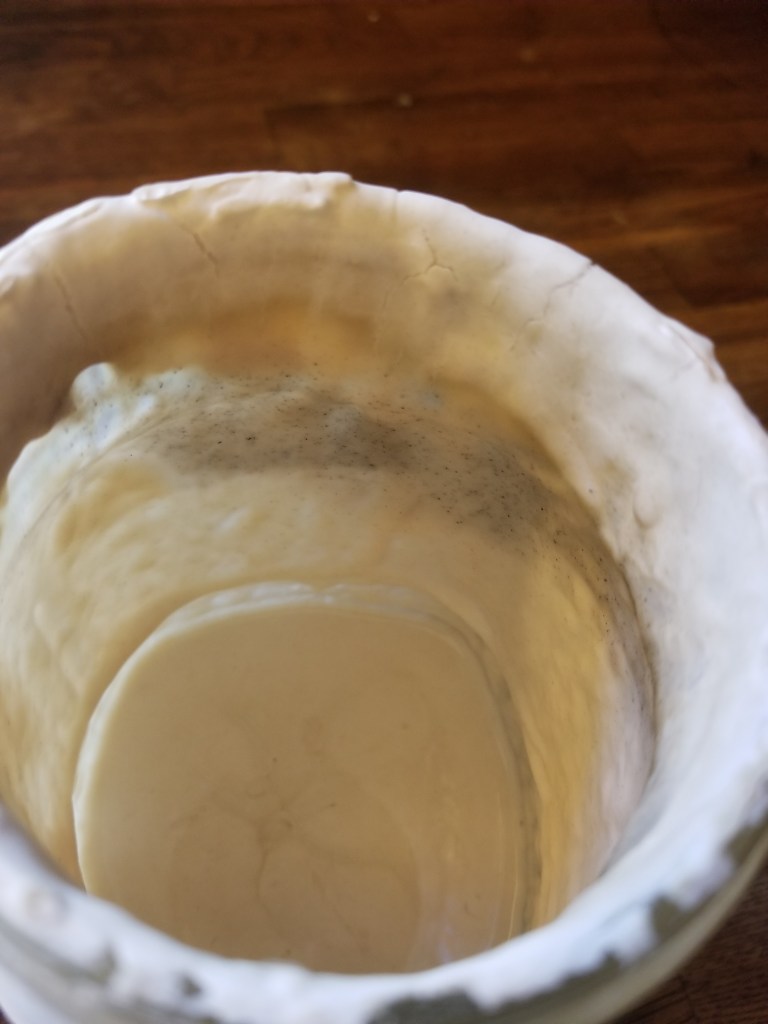
  1. This dressing is supposed to be thick. Tahini naturally separates into solid and oil. Knowing this, I recommend pouring off the oil on top (save it to add back in to the tahini jar) and using the nice, thick slugdey bits from the bottom of the jar. This is compensated for at the end when you add in water until the dressing is the consistency you prefer.
  2. This is meant to be customized to YOUR taste! I err on the side of more lemon and more tahini. If you think it is lacking in salt, add a dash more soy sauce until it tastes right to you.
  3. If you’re not a big garlic person, start with half, or leave it out! You need to make food you like so that you eat it.

Substitutions

  • use whatever oil you have and enjoy if canola isn’t your jam
  • tahini probably should stay tahini, but cashew or sunflower seed butter could definitely work here
  • white or sherry vinegar in place of apple cider vinegar (you could use a little less even)
  • if you have gluten concerns but aren’t vegan, worcestershire sauce could easily replace the soy sauce, but start with half as much
  • you could use chives or green onions in place of the wild onions, either fresh or dried
  • sesame seeds and parsley are the most optional ingredients, they won’t really make or break the dressing (but I like them in there, a lot!)

Also, if I haven’t shared this kitchen hack before: if you have a recipe that calls for fresh parsley and you have to buy a bunch from the store, dry the rest! Most recipes call for a few tablespoons, at most, and drying it is not only an easy way to save on wasting the rest, but it is so cost effective!

Duck Fried Rice

Tis the season to use up those leftovers. Lucky for me, I have this space as a personal, online recipe book.

Our Fall Feast was a bit toned down this year, what with fixing up a 90 year old house and planning how to plant two rolling, hilly acres (plus gully) – chickens and sweatpants, here I come! We cooked up a meager spread: roast local duck, green bean casserole, mashed taters, stuffing, and homemade local pumpkin pie. As usual, a 4 pound duck turned into many, many meals. I got the chance to look back to a few winters ago, and adapted my leftover goose pot pie recipe to this duck and what we had in the fridge. I’ve been working on my pie crimp game, can you tell?

Also, for the first time in 5 years, I didn’t overcook the duck! Thanks, in part, to a new recipe site I discovered, which also served as the catalyst for throwing together what was, for sure, the best fried rice I have ever made at home. The trick, it turns out, is to not skimp on the oil. Surprise, surprise – look at that oil shimmer!

Quick and simple to throw together – the hardest part is needing cold (preferably at least day old) rice. Based off the recipe from Hank Shaw.

Ingredients – added in the order listed

  • 1 large carrot, peeled, small dice
  • 2 tsp olive oil
  • 1/2 large onion (I used yellow, any type will do)
  • 1 tbsp duck fat (substitute high smoke point oil of your choice)
  • 2/3 cup frozen peas (thawed)
  • 2/3 cup leftover duck, shredded/chopped
  • 1 inch ginger chunk, peeled and minced
  • 1 tsp garlic powder
  • 2 cups day old rice (I used Nashiki sushi rice)
  • 2 tbsp canola oil (divided)
  • 2 eggs, whisked
  • 2 tbsp soy sauce (divided) – check label for “wheat” if you are gluten intolerant

To a large fry pan or wok, add carrot and olive oil over medium heat. Stir and cook while you dice up the onion. After a minute or two, with the carrots fragrant, add the diced onion and duck fat. Cook 5-10 minutes until carrots are fork tender and onions are lightly browned. Add thawed (or fresh!) peas, cooking two minutes more. Add duck, but do not stir. Add ginger, garlic powder, and one tbsp of canola oil, then rice, stirring well to coat the rice in oil. You may need to decrease the heat at this point.

Crack two eggs into a bowl and (fork) whisk vigorously until creamy yellow. Move rice mixture to one side of the pan (if your stove is not level like mine, move to the higher side of the pan). Add the remaining 1 tbsp canola oil to the naked side of the pan. Once lightly shimmering, add whisked eggs to the oil. As the eggs start to firm and cook, gently fold them from the sides, creating fluffy sheets of scrambled eggs. Once they are done to your liking, stir all together with the rice mixture. Turn the heat back up to medium, leveling the fried rice in the pan and let cook, undisturbed for 1-2 minutes. Pour 1 tbsp of soy sauce around the edges of the pan and quickly stir to combine. Allow the mixture to sit for one minute and repeat with the remaining soy sauce.

Serve warm as is, or add your favorite additional toppings such as sesame seeds, chili garlic paste, and/or scallions. I bet this would also be great with a side of kimchi.

My personal complaint about restaurant fried rice is always the rice:everything else ratio, but following this ricepe (see what I did there?) flips the ratio and then some. Rejoice, for the egregious amount of oil(s), fiber form the vegetables, and protein in the duck make your body absorb the carbohydrates (glucose) from the rice much more gradually, keeping your energy level and your belly full.

Curry Chicken Salad

A nice fridge and pantry clearing staple. Some people like eating warm things when it is cold and cold things when it is warm, but I believe the sweet, warming spices in this dish, though served cold, let it straddle the line for an any weather meal.

Ingredients (makes 6 servings):

  • 2 boneless, skinless chicken breast*
  • 1 cup diced red onion
  • 1 cup diced celery
  • 1/2 cup chopped cilantro
  • 1/2 c chopped cashews
  • 1 cup reduced sugar dried cranberries

Chicken Baste:

  • 1/2 c mayo
  • 1/2 tsp each turmeric, curry powder, garlic powder
  • pinch salt

Yogurt Dressing:

  • 1/4 cup natural sour cream (see note)
  • 3/4 c plain low-fat yogurt
  • 1/2 tsp each turmeric, curry powder, and garlic powder

Two methods of chicken preparation:

  1. Preheat oven to 375. While heating, combine basting ingredients. Pat chicken dry and evenly coat with mayo mixture. Place on foil-lined baking sheets and roast ~15-25 minutes until chicken reaches an internal temperature of 165 for 15 seconds. Set aside to rest.
  2. Alternately, for a lower fat version, simmer chicken in water or low-sodium stock until falling apart tender. This can be done stove top or in a slow cooker.

While chicken is cooking (or cooling) fine dice 1 whole red onion (yield ~1-1.5 cups), roughly 6 large celery stalks, and 1/2 cup cilantro. Cashews can be chopped with a chef knife or lightly smashed with a meat tenderizer–I recommend using a plastic zip top bag for this method to *mostly* contain the mess. Reduced sugar dried cranberries can be left as is or roughly chopped. Combine in a large bowl.

When chicken is cool enough to handle, shred or dice bite sized–however you prefer your chicken salad. I alternate between the two depending on if I am feeling like curry chicken salad salads (diced) or curry chicken dip and wraps (shredded).

In a separate bowl, combine sour cream, yogurt, and spices. Taste and adjust seasoning to you preferences–start with less if you are hesitant and add slowly, fully incorporating before tasking again. I like to taste by mixing a teaspoon of my filling with a little bit of the yogurt dressing (knowing that over time the flavors will meld). Once you have the spice you like, stir it all together and enjoy! Will keep, covered and refrigerated, for up to a week.

*You can absolutely use bone in skin on if that is what you have/prefer, I would recommend basting the chicken and allowing to marinate refrigerated for 30 minutes or so to impart more flavor as you will want to remove the skins before chopping/shredding.

Note on sour cream: I have a strict preference for sour cream labeled as “natural”. It is made without stabilizers and typically only has three ingredients: cultured cream and skim milk, and enzymes. However, you can totally omit this and just use yogurt! Plain Greek yogurt and skyr work especially well as sour cream substitutes.

A note on plant-based… why would I label a chicken recipe “plant-based”? Because it is. This recipe is based in plants, the majority of the ingredients are plants, which is how you arrive at the definition of “plant-based“. As a dietitian, I think this is a really important distinction that all I talk about in all my classes. Plant-based does not exclusively mean vegetarian or vegan, it just means you mostly eat plants. Take it a bit farther, and you’re focusing more on whole (less processed) foods and incorporating small amounts of animal products that have (preferably) been raised in a regenerative and humane way. Plant-based and planet-based are the way to health.

Nutrition information:

Stuffed Acorn Squash

Elevating a tried and true cold weather meal, the following recipe for Teriyaki Tofu Stuffed Acorn Squash will give you the opportunity to learn new skills, practice techniques, and master a new sauce for your arsenal.

Teriyaki Sauce – this will keep, unadulterated, for up to three months in the fridge.

  • soy sauce – any variety, any brand. Low sodium is fine. If you are gluten-free, soy is notoriously not, check the ingredients label diligently!
  • mirin – high sugar, low alcohol content rice wine. What I’ve been able to find easily is “aji-mirin” which is basically a cheap alternative, but it works!
  • dark brown sugar – yes, light brown sugar will work just as well, but I prefer the deeper molasses taste from dark brown sugar (always)

Combine the above in equal amounts. If you aren’t sure that you will like the final product, start with 1/4 cup of each and a very small sauce pan. Over medium heat, stir continuously until the sugar has dissolved. Bring the heat up to medium-high, stirring and scraping down the sides of the pot occasionally until it has come to a boil. Turn the heat down to medium-low and simmer, stirring occasionally until it has reached your preferred sauce consistency. Err on the side of too thick as the moisture from whatever you toss in your sauce will thin it.

This sauce can be dressed up with minced fresh ginger and/or garlic. Store leftovers in a lidded contained in the fridge. If you have added any ingredients beyond the initial three, I would recommend using leftovers within a week. I like to make a batch of rice at the same time as a base for quick and easy savory breakfast. Toss with some vegetables (raw, roasted, sauteed) and your favorite protein. You can even dress it up with a fried or soft boiled egg.

We are a household full of kitchen gadgets, but one thing we have so far gone without is a spiralizer. Maybe this dish would have been cuter topped with a vegetable nest, but these super easy matchstick veg can be made with the pokey side of your vegetable peeler. This goes for anytime you want matchsticks without the agony of hand cutting them, such as coleslaw. Use the peeler as normal, but pokey side to your vegetable. In this case, I used both carrot and watermelon (daikon) radish. After matchsticking, I placed the veg in a bowl covered with cold water and into the fridge. This keeps them crisp for days.

To roast acorn squash:

  • preheat oven to 400°F
  • halve squash from stem to tip, scoop out and discard the seeds and stringy goopy bits, and generously coat both halves inside with oil (olive, canola, or vegetable are fine) and sprinkle with salt and pepper.
  • place squash on pretty much anything oven safe with low sides, cut side up
  • roast, basting the squash with oil that has dripped off the edges into the “bowl” a few times, until the flesh is easily pierced all the way through with a fork.
  • ** if you prefer not to use so much oil: lightly oil a baking sheet, place the squash inverted – cut side down – onto the baking sheet. This way, it will steam itself.

For crispy tofu:

This trick was learned through trial and error. While I LOVE fried tofu, I despise frying things. It takes a lot of oil, it’s messy, the clean up sucks, and me and the house smell like used oil all day. Yum… Instead, try this:

  • Start with extra firm tofu. If you have a tofu press, skip to the next step, if not: Remove from the packaging and dry with a tea towel. Wrap the tofu in a different tea towel, and then another fluffier towel. [note: any kitchen towels are fine, I like to use not fluffy ones for touching the tofu. If this makes you uncomfortable and lint-fearing, wrap the tofu in a piece of paper towel first before layering in cloth]
  • Place the tofu on a flat surface. Top the tofu with heavy stuff. Things I have previously used: multiple large cookbooks, bricks/stones, Kitchenaid stand mixer, bowl full of potatoes… use your imagination, but make sure the heavy things will not topple or if they do that they are not breakable. I like to use the back corner of my countertop where the weight can be supported on two sides by the walls. As the tofu settles, the weight will likely shift and may even fall off. Leave for 30 minutes up to two hours.
  • Remove weights and wrapping, and slice the tofu vertically into ~ 1/2 inch slices. Lay the slices directly on the rack of either a toaster oven or full size oven (depending on the spacing of the rails on your racks, you may need to finagle this a bit). Turn the heat on to 350-375°F and bake until evenly, lightly browned, approximately 25 minutes. Turn off the oven, prop the door open and let cool slightly before removing.

This crispy tofu will pair perfectly with the rice and teriyaki sauce awaiting you for breakfast. I like to eat it exactly as is or slice it further into strips for use in salads or wraps.

To beef up this stuffed squash, I sauteed some wilting bok choy, totsoi, and onions, which I tossed with the cubed, crispy tofu.

This can easily be served in the squash, as is, straight from the oven. To make it look fancier, I used a circular mold to create a roasted squash “bowl”, set atop some local pea shoots. I filled this with the tofu veg mixture, drizzled on some teriyaki sauce, topped with matchstick carrots and watermelon radish. The combination of different textures and flavors of seasonal, local vegetables was delightful and can, of course, be adapted with whatever you have on hand.

Recipe: Thai Chanterelle Coconut Rice

Enjoy this latest recipe creation lightly adapted from Moosewood Restaurant. Keep scrolling to find the bloggy bit where I talk about jasmine rice and oyster mushroom heartache.

Ingredients for 4-6 servings:

  • 1 13.5 oz can of coconut milk, divided
  • 4 tbsp lime juice, divided
  • 1 tbsp minced fresh basil
  • 1 tsp minced fresh cilantro
  • 1 tsp sugar
  • 2 tsp canola oil, divided
  • 3 small chiles, seeded + minced, divided
  • 1 1/3 c long grain white rice
  • 1 1/4 c boiling water
  • 2.5 tbsp kosher salt, divided
  • 1 red bell pepper
  • 1 orange bell pepper
  • 1 pint green beans
  • 1 tbsp unsalted butter (optional)
  • 1 tsp grated fresh ginger
  • 2 garlic cloves
  • 10-14 oz chanterelles, sliced into bite size pieces (or white oyster mushrooms)

First, bring 1 1/4 c water to a boil. While waiting on the water to heat, make the dressing by combining 1/4 c coconut milk, 3 tbsp lime juice, minced basil + cilantro, and 1 tsp sugar. Whisk vigorously ~2 minutes until sugar is dissolved. Alternately, you could combine all ingredients in a lidded container and shake vigorously for ~2 minutes.

In a medium sized (roughly 1.5-2 qt) lidded sauce pan (probably the one you usually cook rice in if you don’t have a rice cooker), heat 1 tsp canola oil over medium heat. Add two thirds of you minced seeded chiles and 1 1/3 c long grain white rice (jasmine works too), stir in with the hot oil and continue stirring and cooking over medium heat for 1-2 minutes–the chiles should start to be fragrant. Add the 1 1/4 c boiling water, 1/2 tbsp kosher salt, and 3/4 c coconut milk. Stir and bring to a boil uncovered over high heat. Once boiling, cover and reduce heat to lowest setting. Cook for 15-20 minutes until the liquid is completely absorbed and rice is fully cooked. Fluff with a fork and set aside.

While the rice is cooking, bring a few cups of water to boil in a large lidded pot. Slice bell peppers into 1-2″ long batons and cut green beans into simliar sized pieces. Once the water is boiling, add 1 tbsp kosher salt and sliced bell peppers. Return cover and boil 1-2 minutes. Remove peppers with a slotted spoon and place in serving bowl. Once the water has returned to a boil, repeat the process with the green beans, starting with adding another tbsp of salt. [The dish can be served hot or cold, and I think this lazy blanching without an ice bath is so nice].

Add the remaining tsp of canola oil to a pan over medium heat. Add the remaining minced chiles, ginger, and garlic, cooking 1-2 minutes until fragrant. Add the optional 1 tbsp unsalted butter and mushrooms. Saute mushrooms over medium heat until softened and lightly browned. Add the remaining tbsp of lime juice and toss to coat. Freeze remaining leftover coconut milk for up to three months.

Two options to serve: combine all vegetables and serve alongside coconut rice drizzled with dressing. Equally as good, but slightly less visually pleasing: combine rice and vegetables, toss with dressing and enjoy. Optional (but you probably should) toppings include microgreens and crushed cashews.

The chiles I used are called lemondrops. I purchased them last year at a farmer’s market in Madison, WI. The vendor told me they were not heirloom, but I saved the seeds anyway to see what would happen. To my delight, they are such beautiful and productive plants! Hotter than a serrano, thin fleshed, bright yellow when ripe with a slightly citrus aroma.

Another decadent option would be to roast either one or both of the bell peppers for a subtle flavor, textural, and visual change. I roasted one of the peppers the first time I made this and would absolutely do it that way again.

This makes a very rice forward dish, which is great for cooking on a budget or feeding a large crowd. Personally, I prefer a higher vegetable:rice ratio, which is why I added sauteed zucchini to my leftovers. As always, feel free to experiment. Increase the amount of listed vegetables. Add more vegetables: leafy greens (spinach, chard, or kale), onions, broccoli, bamboo shoots, water chestnuts, or sprouts would be great here. Seasonal variations could include swapping in peas and asparagus in the spring time.

To increase protein content, but keep it vegan I would use either extra firm tofu or tempeh with this dish. If that is not a dietary concern, baked chicken, pork, or salmon would be my top choices.

Mushrooms are one of very few sources of dietary B-12 not derived from animal products. B-12 is an essential vitamin that is involved in metabolism and energy pathways. For more information, check out the NIH.

We ordered a CSA for the week, that upon pick up came with a free 12 oz of white oyster mushrooms! I was too excited about free food to remember where they came from, but they were definitely foraged, not commercially grown. Having this addition to our box is what led me to this recipe idea. My heartache with this dish began when my curbside grocery pick up order did not include the jasmine rice I bought just to make this. It probably would have enhanced the flavor a little bit, but we did not miss it. The second heartache came when the entire dish was prepared except for the mushrooms. When I went to cut into them, I realized they were full of holes. Burrowing holes. Having grown up with a father who loves mushroom hunting, I knew what this meant before I cut in. I thought, “Maybe it’s okay. Maybe it is just a little bit.”

It was not a little bit. It was a whole lot of large squiggly… fly larvae and I’m horrified for whoever else received this “gift” without knowing it could be a possibility. Luckily for me, my partner reminded me we had frozen mushrooms my dad had previously gifted us. A sandwich bag of chanterelles saved the day! This is especially pleasing as they are the only mushroom I would choose to eat. [Free is my favorite flavor, which is why I was willing to give the oyster mushrooms a spotlight].

Let me know if you try this out or what other changes you think would be good!

Growing

While every day is a celebration, passing the Registration Examination for Dietitians was a cause for cake.

Quinoa carrot cake with currants and maple cream cheese frosting, to be exact. Surely studying for four hours a day for over a month deserves it’s own reward.

This is the second time I’ve made this cake and it was easily devoured by the two of us in a week. I’ve had the quinoa flour on hand for well over five years (please don’t keep flour as long as I do) and am so impressed with how well this turned out. I chose this recipe based solely on the fact that I had every single ingredient on hand and I’ve been enjoying using up the weird ingredients I’ve accumulated over the years.

Lightly adapted from Quinoa Cuisine by Jessica Harlan & Kelley Sparwasser:

  • 2 c quinoa flour
  • 1 c packed dark brown sugar
  • 2 tsp baking powder
  • 1/4 tsp iodized salt
  • 3 large eggs
  • 1 c unsweetened applesauce
  • 1/4 c canola oil
  • 1 tbsp vanilla extract
  • 3 c grated carrots
  • 3/4 c dried currants

Preheat oven to 350°F and grease your cake pan (two 8″ rounds if you have them, I used a metal 9″ x 13″). Mix dry ingredients together and set aside. In a stand mixer or with hand beaters, beat the eggs on medium for two minutes. Turn the mixer to low and add the applesauce, canola oil, and vanilla extract until combined, then add the carrots. Incrementally add the dry ingredients until just combined. Turn off the mixer and fold in the currants by hand.

Fill your prepared pan(s) and bang it on the counter ~5 times to settle the batter and remove any air bubbles. Bake 20-25 minutes. Check for doneness by pressing a finger to the center of the cake. It should have a light give and the indent should bounce back. Cool in the pan for twenty minutes, then turn onto a wire rack. Allow to cool completely before frosting. This is the worst part because you will want to eat it right away. For the frosting:

  • 8 oz cream cheese
  • 1 stick unsalted butter, softened
  • 3 c confectioners sugar
  • 2 tbsp maple syrup

While the cake is baking, whisk together the cream cheese and softened butter. To speed up this process, let the cream cheese sit at room temperature while you are combining the ingredients for the cake. Once well combined, add the maple syrup, then the confectioners sugar one cup at time. I recommend tasting after each addition to determine your sweetness preference. Try not to eat it all before the cake cools.

I used applesauce that I canned this winter from a mix of “seconds” from Kapnick Orchards. Dark brown sugar is a personal preference. With more people cooking and baking from scratch, I recommend using iodized salt to prevent iodine deficiency and it’s negative health consequences (goiter). Canola oil contains more omega-3 fatty acids than vegetable oil and will not change the flavor. Though the original recipe calls for it, I don’t peel my carrots–I think it is a waste of time especially in this type of application where you won’t see the carrots.

This cake is a decadent indulgence, but you deserve it. I’ll leave the nutrition facts at the very end so you only have to see them if you want to.

In short news, the garden is strong in growth and I’ll give another tour soon.

I finally graduated to cloth covers for my booch brewing made from fabric my mom bought for me in 2007 that has moved from Chicago to Georgia to Michigan before finally being used 13 years later.

And finally, to round things out: a failure. Not only have I managed to suffocate, then revive my sourdough starter, but now I have killed it with mold. Time to start starting anew.

Growth doesn’t usually take the path we think it should and forward doesn’t look the same from day to day. Sometimes it is best to just choose cake.