Recipe: Thai Chanterelle Coconut Rice

Enjoy this latest recipe creation lightly adapted from Moosewood Restaurant. Keep scrolling to find the bloggy bit where I talk about jasmine rice and oyster mushroom heartache.

Ingredients for 4-6 servings:

  • 1 13.5 oz can of coconut milk, divided
  • 4 tbsp lime juice, divided
  • 1 tbsp minced fresh basil
  • 1 tsp minced fresh cilantro
  • 1 tsp sugar
  • 2 tsp canola oil, divided
  • 3 small chiles, seeded + minced, divided
  • 1 1/3 c long grain white rice
  • 1 1/4 c boiling water
  • 2.5 tbsp kosher salt, divided
  • 1 red bell pepper
  • 1 orange bell pepper
  • 1 pint green beans
  • 1 tbsp unsalted butter (optional)
  • 1 tsp grated fresh ginger
  • 2 garlic cloves
  • 10-14 oz chanterelles, sliced into bite size pieces (or white oyster mushrooms)

First, bring 1 1/4 c water to a boil. While waiting on the water to heat, make the dressing by combining 1/4 c coconut milk, 3 tbsp lime juice, minced basil + cilantro, and 1 tsp sugar. Whisk vigorously ~2 minutes until sugar is dissolved. Alternately, you could combine all ingredients in a lidded container and shake vigorously for ~2 minutes.

In a medium sized (roughly 1.5-2 qt) lidded sauce pan (probably the one you usually cook rice in if you don’t have a rice cooker), heat 1 tsp canola oil over medium heat. Add two thirds of you minced seeded chiles and 1 1/3 c long grain white rice (jasmine works too), stir in with the hot oil and continue stirring and cooking over medium heat for 1-2 minutes–the chiles should start to be fragrant. Add the 1 1/4 c boiling water, 1/2 tbsp kosher salt, and 3/4 c coconut milk. Stir and bring to a boil uncovered over high heat. Once boiling, cover and reduce heat to lowest setting. Cook for 15-20 minutes until the liquid is completely absorbed and rice is fully cooked. Fluff with a fork and set aside.

While the rice is cooking, bring a few cups of water to boil in a large lidded pot. Slice bell peppers into 1-2″ long batons and cut green beans into simliar sized pieces. Once the water is boiling, add 1 tbsp kosher salt and sliced bell peppers. Return cover and boil 1-2 minutes. Remove peppers with a slotted spoon and place in serving bowl. Once the water has returned to a boil, repeat the process with the green beans, starting with adding another tbsp of salt. [The dish can be served hot or cold, and I think this lazy blanching without an ice bath is so nice].

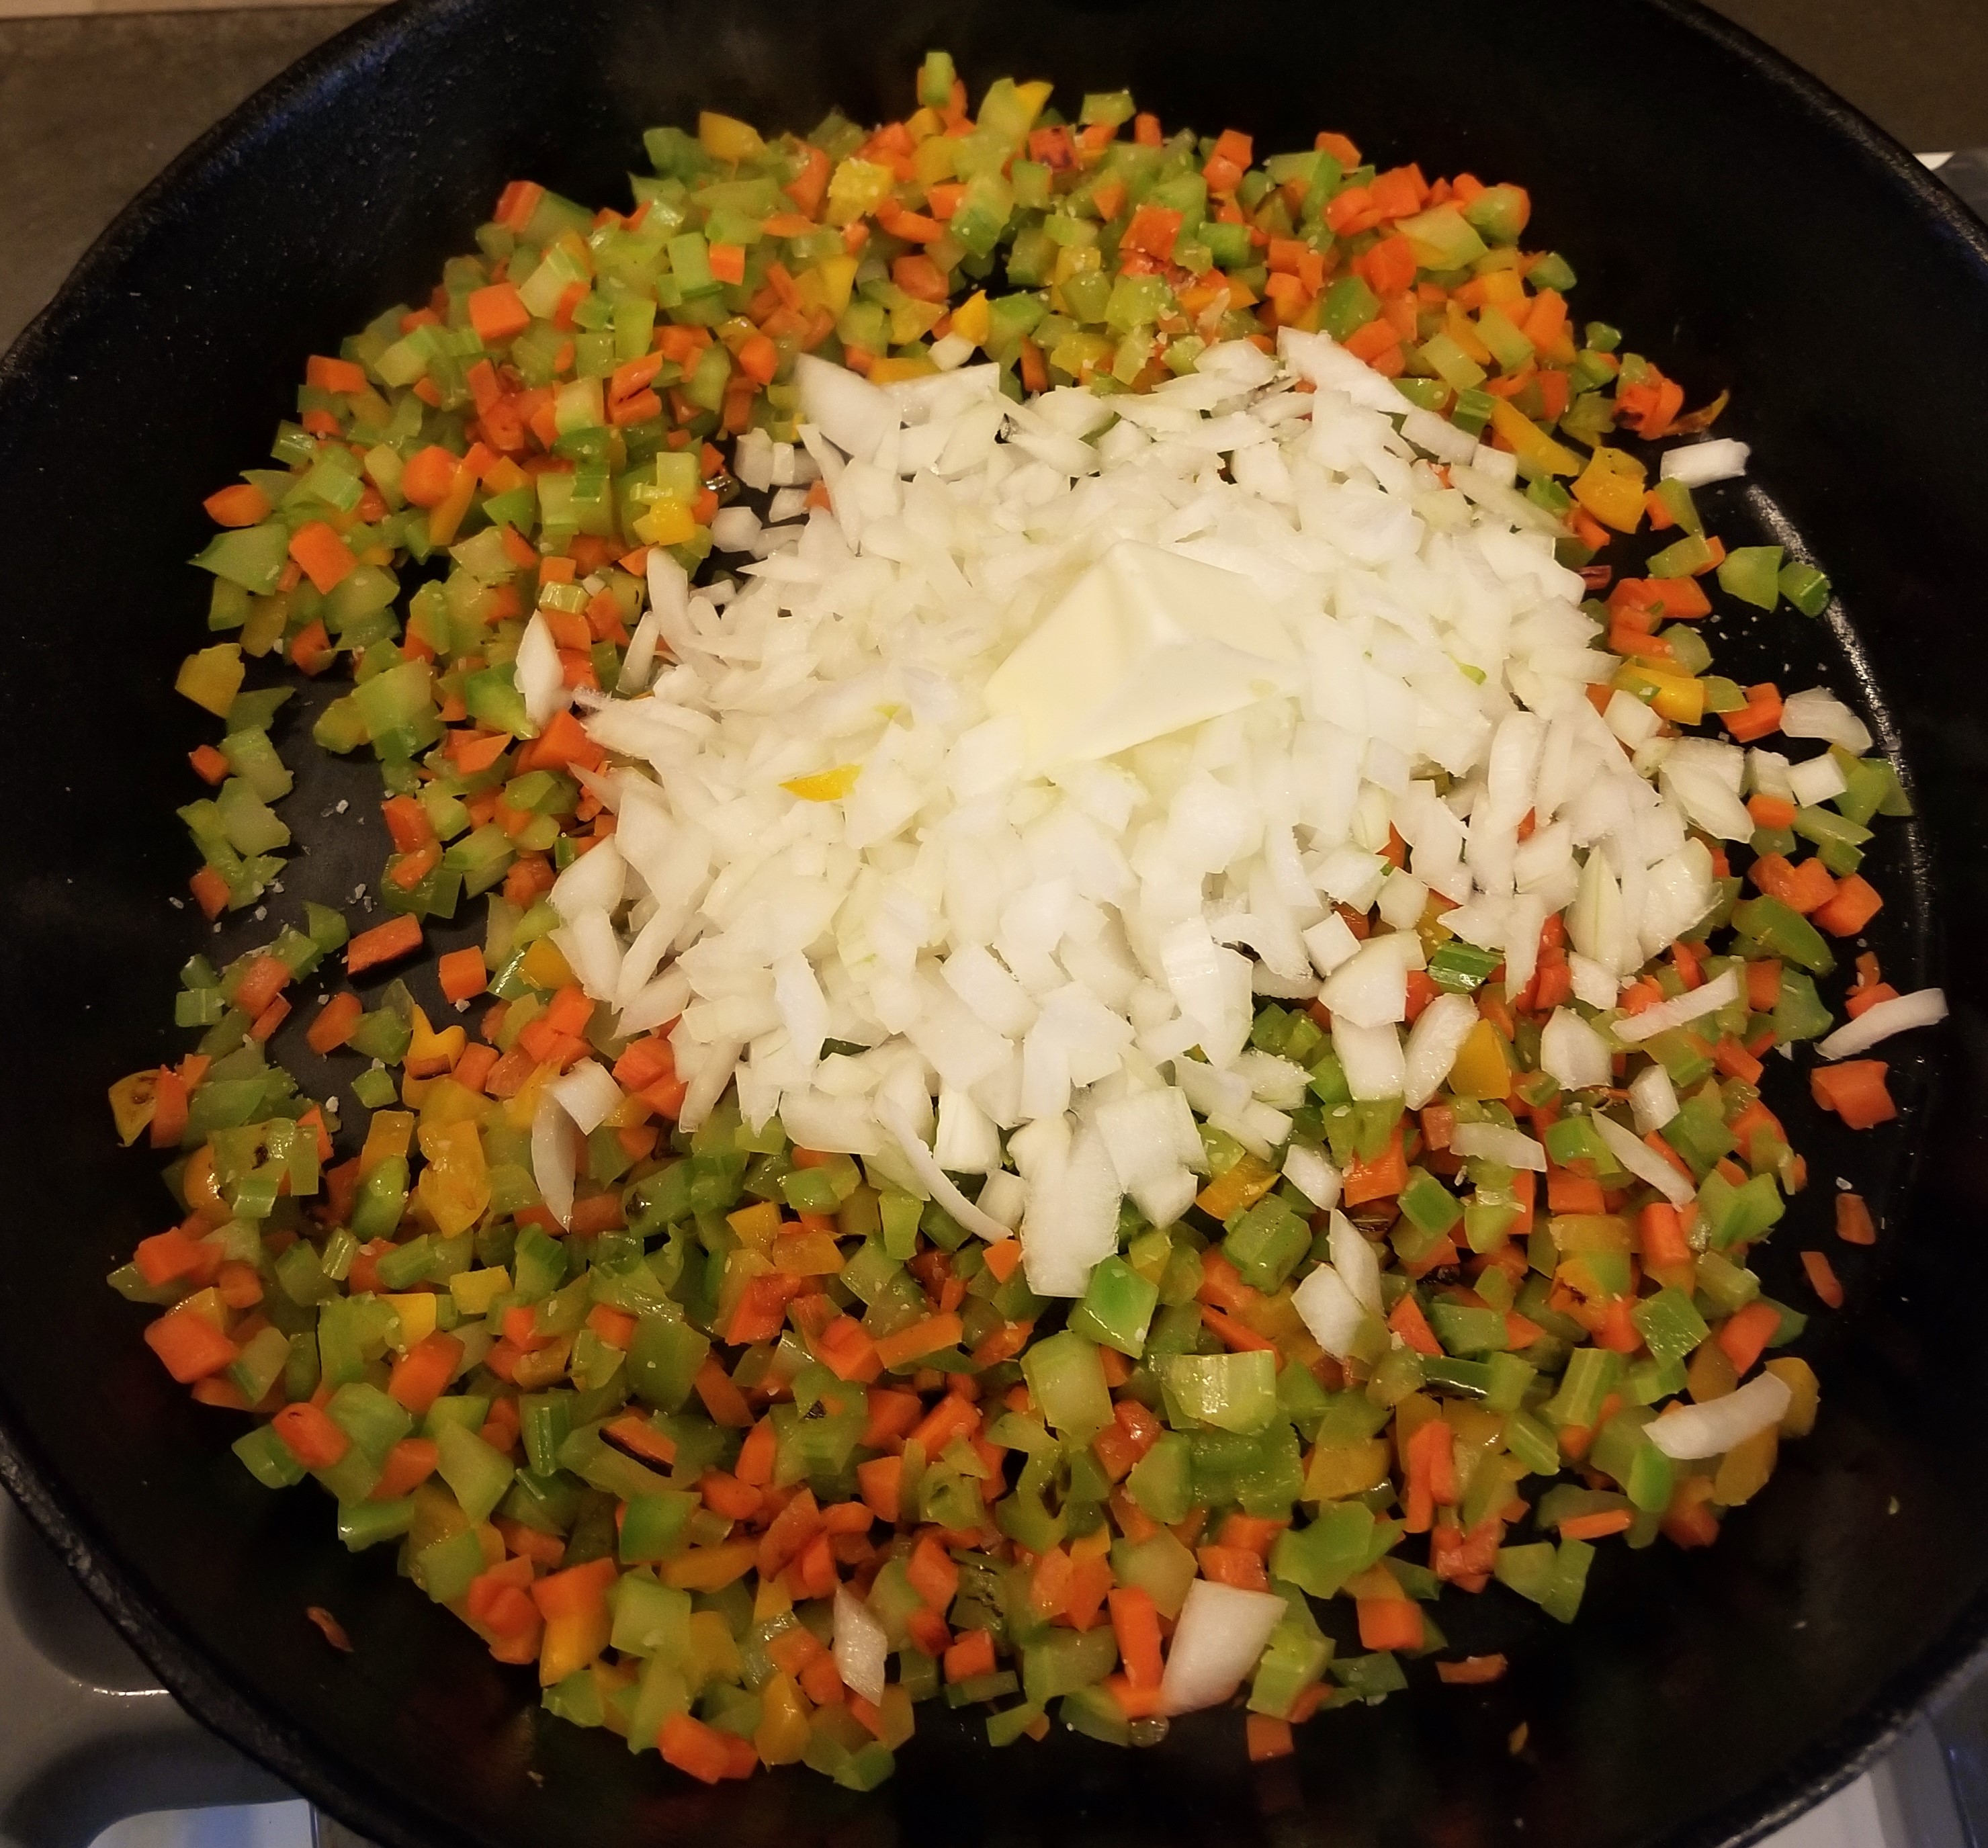
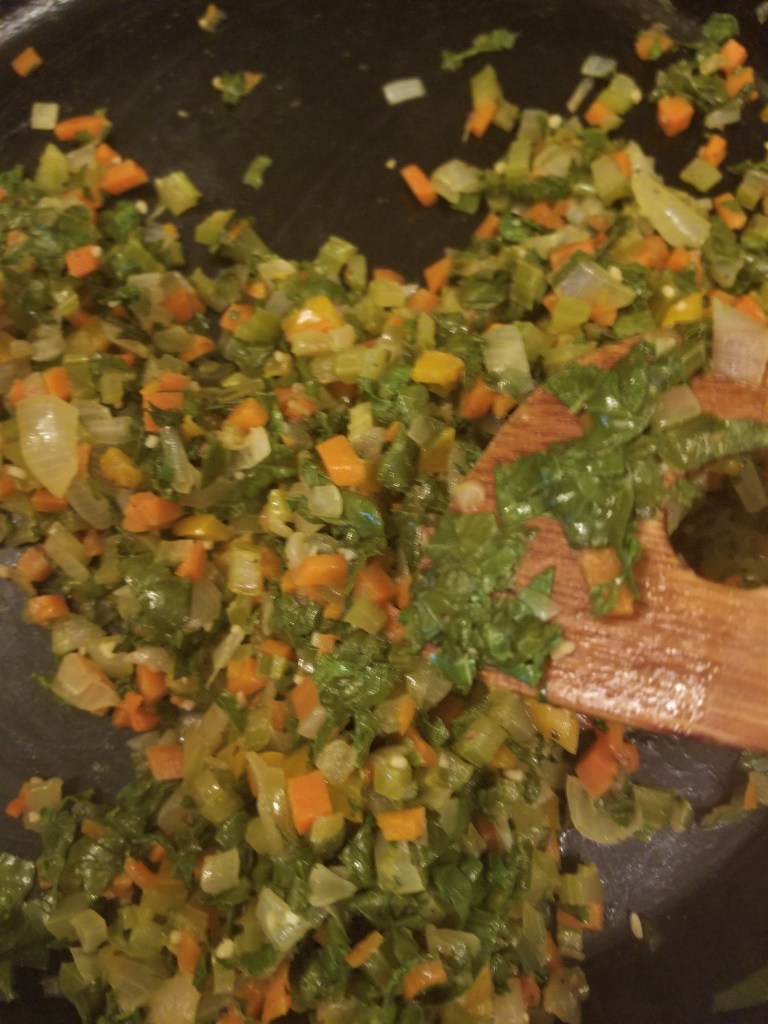
Add the remaining tsp of canola oil to a pan over medium heat. Add the remaining minced chiles, ginger, and garlic, cooking 1-2 minutes until fragrant. Add the optional 1 tbsp unsalted butter and mushrooms. Saute mushrooms over medium heat until softened and lightly browned. Add the remaining tbsp of lime juice and toss to coat. Freeze remaining leftover coconut milk for up to three months.

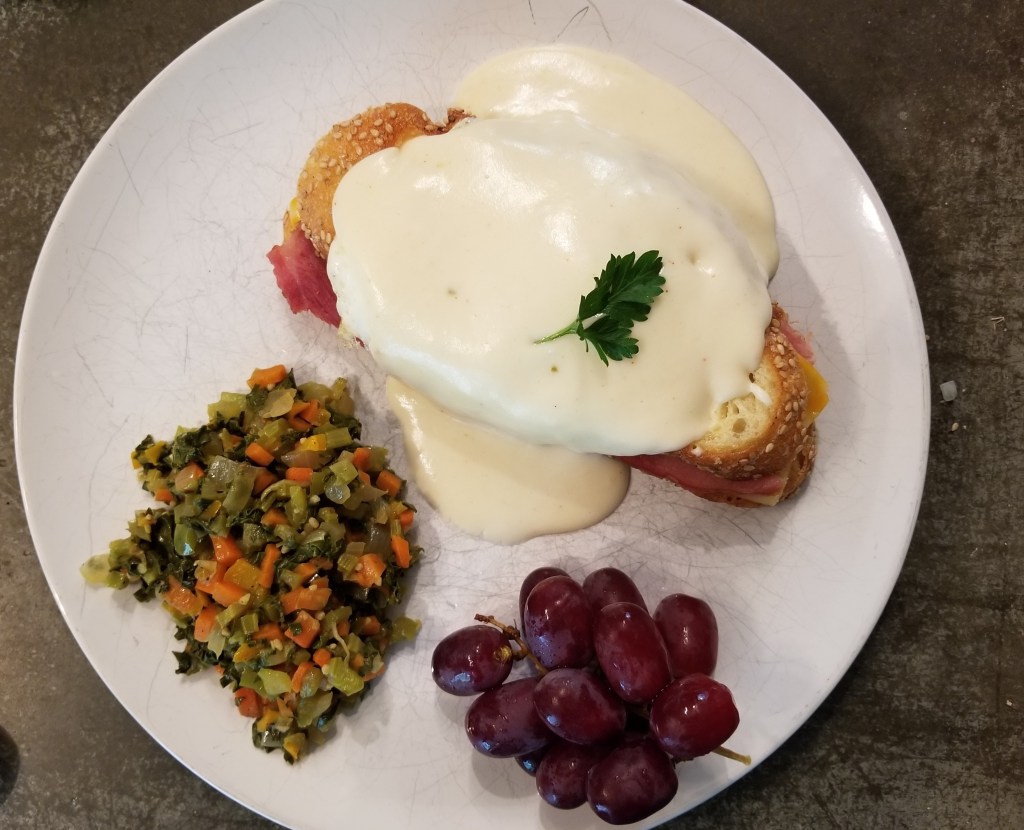
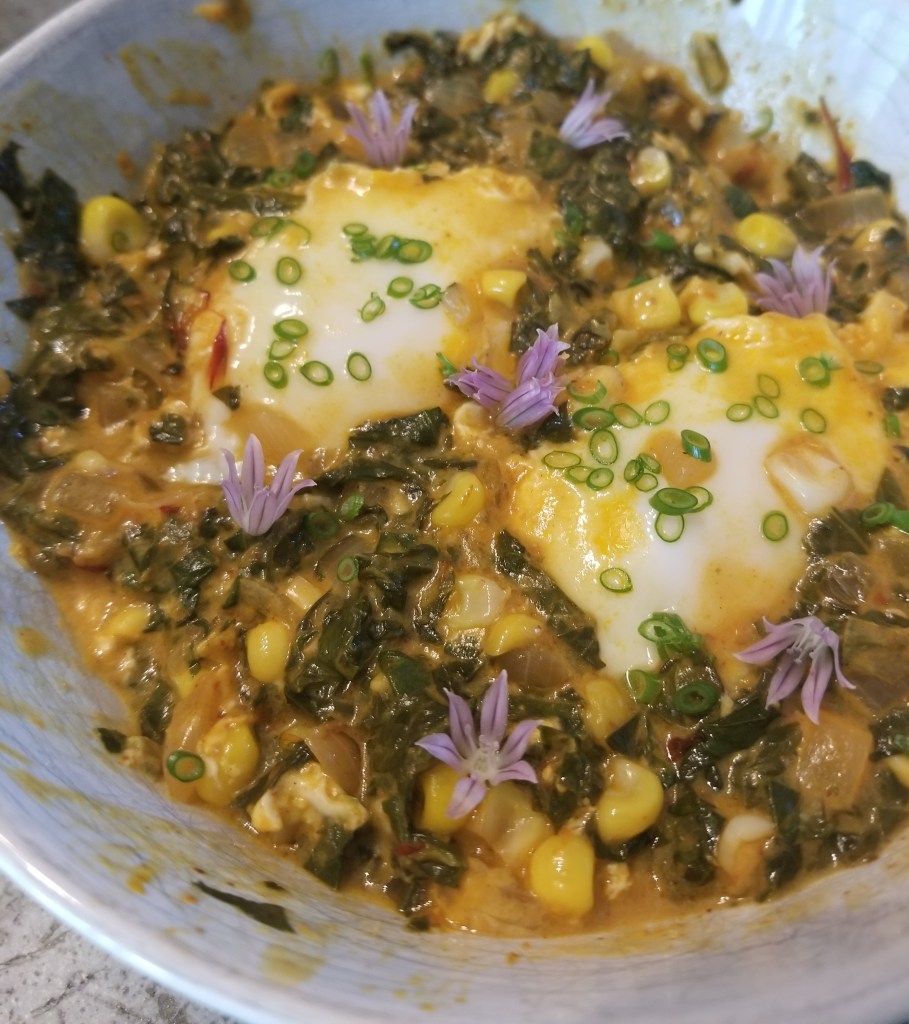
Two options to serve: combine all vegetables and serve alongside coconut rice drizzled with dressing. Equally as good, but slightly less visually pleasing: combine rice and vegetables, toss with dressing and enjoy. Optional (but you probably should) toppings include microgreens and crushed cashews.

The chiles I used are called lemondrops. I purchased them last year at a farmer’s market in Madison, WI. The vendor told me they were not heirloom, but I saved the seeds anyway to see what would happen. To my delight, they are such beautiful and productive plants! Hotter than a serrano, thin fleshed, bright yellow when ripe with a slightly citrus aroma.

Another decadent option would be to roast either one or both of the bell peppers for a subtle flavor, textural, and visual change. I roasted one of the peppers the first time I made this and would absolutely do it that way again.

This makes a very rice forward dish, which is great for cooking on a budget or feeding a large crowd. Personally, I prefer a higher vegetable:rice ratio, which is why I added sauteed zucchini to my leftovers. As always, feel free to experiment. Increase the amount of listed vegetables. Add more vegetables: leafy greens (spinach, chard, or kale), onions, broccoli, bamboo shoots, water chestnuts, or sprouts would be great here. Seasonal variations could include swapping in peas and asparagus in the spring time.

To increase protein content, but keep it vegan I would use either extra firm tofu or tempeh with this dish. If that is not a dietary concern, baked chicken, pork, or salmon would be my top choices.

Mushrooms are one of very few sources of dietary B-12 not derived from animal products. B-12 is an essential vitamin that is involved in metabolism and energy pathways. For more information, check out the NIH.

We ordered a CSA for the week, that upon pick up came with a free 12 oz of white oyster mushrooms! I was too excited about free food to remember where they came from, but they were definitely foraged, not commercially grown. Having this addition to our box is what led me to this recipe idea. My heartache with this dish began when my curbside grocery pick up order did not include the jasmine rice I bought just to make this. It probably would have enhanced the flavor a little bit, but we did not miss it. The second heartache came when the entire dish was prepared except for the mushrooms. When I went to cut into them, I realized they were full of holes. Burrowing holes. Having grown up with a father who loves mushroom hunting, I knew what this meant before I cut in. I thought, “Maybe it’s okay. Maybe it is just a little bit.”

It was not a little bit. It was a whole lot of large squiggly… fly larvae and I’m horrified for whoever else received this “gift” without knowing it could be a possibility. Luckily for me, my partner reminded me we had frozen mushrooms my dad had previously gifted us. A sandwich bag of chanterelles saved the day! This is especially pleasing as they are the only mushroom I would choose to eat. [Free is my favorite flavor, which is why I was willing to give the oyster mushrooms a spotlight].

Let me know if you try this out or what other changes you think would be good!

Dolmas, or the best food I’ve made this year

Dolmas – stuffed grape leaves – are surprisingly uncomplicated to make at home. Outside of “traditional” seasonings, the ingredients are straightforward and you likely have at least some of them at home. The critical ingredient, of course, is the grape leaves.

Sometimes the seasons and my food cravings line up perfectly. The best time of year here to harvest grape leaves is late spring to early summer.

If you are foraging for grape leaves, the most important thing to note is that there are inedible, dangerous look-alikes. True grape vines have two distinct features that you can use to correctly identify them: 1. they make grapes and/or 2. the have soft, green tendrils. If you have any doubts, check with a local foraging expert.

When picking leaves, you want to search for those near the end of vines as they are younger and will be more tender. For ease of stuffing and rolling, you want leaves that are roughly the size of your opened hand, 5-6″ in diameter. Smaller leaves are fine, know that they will be more difficult to work with and make smaller rolls. Use scissors or your thumb nail and forefinger to pinch off the leaf right at its base. You do not want any stem remaining.*

I used this foraging site as a guide for picking, blanching, and marinating with only a few slight changes. As recommended, I picked 32 leaves. A few more would fit in the marinade (see below), but I recommend doubling the whole lot.

Directions:

  1. Rinse leaves to remove and debris and blanch in a large pot of water (roughly 8 cups), with a 1/4 cup white vinegar and 2 tbsp kosher salt. Blanch, stirring frequently for 5-10 minutes. Stirring will seem scary. Surely these leaves must be delicate, they feel delicate! Hint: they are not so delicate.
  2. Once tender, drain the leaves. Once cooled slightly, I squeezed each leaf to remove the excess water.
  3. To marinate: combine 1 c white vinegar with 1/2 c canola oil, 1/2 c olive oil, and 1.5 tsp kosher or sea salt. Marinate for 20 minutes up to two weeks in the fridge. Do NOT use an airtight container. I used a wide mouth mason jar with the lid loosely on. All leaves should be covered, I used a chopstick to poke them down and remove any air bubbles. Again, they are not as delicate as they seem.

I am a bit of a glutton for punishment and like to physically make as much of a recipe as I can. To this end, I sought out a recipe for Bahārāt seasoning to use when cooking the lamb for my filling.

In a mortar and pestle or spice mill/coffee grinder, working in batches, combine:

  • 2 tbsp black peppercorns
  • 2 tbsp coriander seeds
  • 1 tbsp allspice berries
  • 1 tsp cardamom seeds (from about 1.5 tbsp pods)
  • 1/2 tsp cloves

Once pulverized to a mostly fine powder (some larger chunks are acceptable, especially if crushing by hand), add:

  • 2 tbsp ground sweet paprika
  • 1.5 tbsp ground cumin
  • 1 tbsp ground cinnamon
  • 1/2 tsp ground mace (substitute nutmeg if needed)

Granted, my seasonings are old, but for 1/2 lb of meat, I used roughly half of this seasoning. It was worth it. Currently, my town is all but out of lamb and I thought that would be the end of it for this recipe. No ground lamb (except frozen, from Meijer, from Australia) and everything was ruined. But I really, really wanted to eat stuffed grape leaves. They were picked. And blanched. And marinated. And I had made the Bahārāt. And cooked the rice. And added dried currants. And caramelized the onions. I chose to use ground beef instead and while it wasn’t perfect, they were so good they brought tears to my eyes.

I can be weird about vinegar and there is a lot in the marinade. I tried both squeezing the marinade off the leaves and rinsing them. Both were delicious, so I went with the easier, though greasier squeezing method; wringing out each leaf before laying out to fill.

Look at how beautiful! You plop a heaping tablespoon of filling near the stem, fold in both sides and roll from stem to tip. Repeat, repeat, repeat and try not to eat the whole batch in one go. My only regret is that I did not make enough filling and had about 10 leaves leftover. That also means I had to run out to the backyard after the rain this morning and pick more grape leaves! No sense in making less than a full batch next time.

While this escapade may have taken multiple hours over many days, it was absolutely worth it. And the next time, when I make more, I am going to wrap them tightly and freeze them for another rainy day.

*On my first go, I took this to mean **absolutely no stem** and used my sharpest paring knife to slim down (like with cabbage for rolls) and nip off the inner most part of the stem. This was a mistake. My leaves all tore at this point and it was unnecessarily cumbersome.

Callaloo

Many moons ago, my sister got married in Jamaica. This trip was full of a lot of firsts for me – maid of honor, international travel, all-inclusive resort (did you know that when you choose liquor for your “mini bar”, it comes in 750 mL bottles?!), and the first time I ever enjoyed cooked greens.

This is the type of amaranth that came with my home. It’s a common “weed” here in Michigan, and also the main ingredient in callaloo, a vegetarian Caribbean dish with as many variations as there are stars in the sky. Each year, I allow a handful of plants to flower and set seed. I have tried saving the seeds, spreading them around the yard, and planting some–though this has not worked as well as forgetting about it and letting the dogs trample them as they see fit.

There are many types of amaranth, some are stunning edible ornamentals. As a bonus, the seeds are an edible grain as well. If you are interested in intentionally growing amaranth from seed, this article from the Spruce is a good place to start.

To this day, I still cannot find a recipe that mimics what I ate, so to the best of my recreation:

The ingredients: amaranth, stem removed and leaves chopped. You’ll need roughly 16 oz fresh, much more than the four leaves shown for leaf size variation. Substitute the dark, leafy green of your choice as needed. If you have less, scale back the other ingredients accordingly. I had roughly 9 oz of amaranth and ended up using only one carrot, one celery stalk, half of each bell pepper and the onion. I’m currently out of fresh garlic for the year until August when the current crop is ready to be harvested, otherwise I would have used 3-4 cloves.

Don’t forget to save those ends for stock! I keep a gallon zip top bag in the freezer (the same one for years). Once it is full, I dump it in a big pot, cover with water, maybe throw in a bay leaf or two if I have them and let it simmer all day long. In the summer, I use the slow cooker instead of the stove and set it in the mud room to keep the house cool(er). I keep a separate bag for chicken bones + scraps, and quart sized bags for various other meats.

I used a 12″ cast iron skillet based on the quantity I was cooking. Carrots, celery, and peppers are cooked first in a tablespoon of unsalted butter.

Once they have softened (15-20 minutes or so), add onions, and fresh garlic if using, with another dab of butter.

After 5 minutes, turn up the heat so you can get some nice toasty bits. Cook another 10 minutes, stirring periodically.

Finally, add the chopped greens and freshly ground coriander seed (+ garlic powder if using), stirring very often until wilted, approximately 3 minutes. Season with salt and pepper to taste.

My favorite way to enjoy this is as a breakfast side or topped with an over medium or soft-boiled egg (see my previous post for my favorite cooking method). When I made this batch, we enjoyed it for brunch with croque madames to use up some leftover béchamel.

This morning, I foraged and harvested 9 oz of braising greens including amaranth, chinese cabbage, swiss chard, red russian and blue curled vates kale. I wanted to try making something new and settled on a green shakshuka. I combined a few different recipes with what I had on hand at home (romesco + chili-garlic paste for harissa, for example). It turned out delicious!

Beyond learning to enjoy cooked leafy greens, that trip to Jamaica taught me I’m not much for resorts, that I’d rather be down and dirty with the locals which is how I have traveled since. If you have a favorite food from traveling, I’d love to hear about it and possibly try to recreate it!

Spring Foraging

Violets (Viola odorata) and (V. sororia)

Both flowers and leaves are edible, but the leaves should be picked young, preferable prior to flowering. Large older leaves are tough, fibrous, and may be bitter.

These early warm days abound with foraging free food–plantains, dandelions, amaranth, and the most easily identifiable and versatile: violets.

Not only a hardy perennial, they are quick spreaders and tolerate even the most frivolous transplanting. When I bought my home, I inherited a veritable field of violets which I have since moved and mowed, and nearly each year I have found a new use for these edible flowers.

Spring salad with homegrown kale, two types of lettuce, walking onion greens, and violets.

If you are harvesting violets for fresh use, they (and other edible flowers) are best stored in glass jars with glass lids.

Violets are an excellent introduction to edible flowers; they are abundant, easy to pick, and their floral flavor is nearly nonexistent. I’ve been adding them to salads since I was old enough to walk. More recently, however, with the excess time the Stay Home order has afforded me, I’ve been branching out.

Behold, Violet Jelly!

I’ve wanted to try my hand at this since I read about it in 2014. This year has been all about finishing old projects and tying up loose ends. It’s both satisfying and sad to check things off a list that has been around for so long.

When you add acid, the sapphire violet tea turns bright purple.

It’s a simple process from making a tea, to experimenting with phytochemicals and pH, and creating a rolling boil with sugar and pectin. I used this recipe as a base, but reduced it to one pint and substituted powdered pectin. As I am unable to test the acid content of this recipe, I would not recommend it for traditional canning.

Next up?

The sapphire colored violet tea has me inspired. This current infusion will be added to my next batch of kombucha… here’s to hoping the acidity will turn it bright purple!

For more information about violets, see the links below from the USDA.

The future line up includes kombucha, sourdough starter & english muffins, and eggs. If there’s something you’d like to see or have questions about, send me an email or post a comment. Thanks!