Jin

The champagne of kombucha. Light, crisp, ultra carbonated.

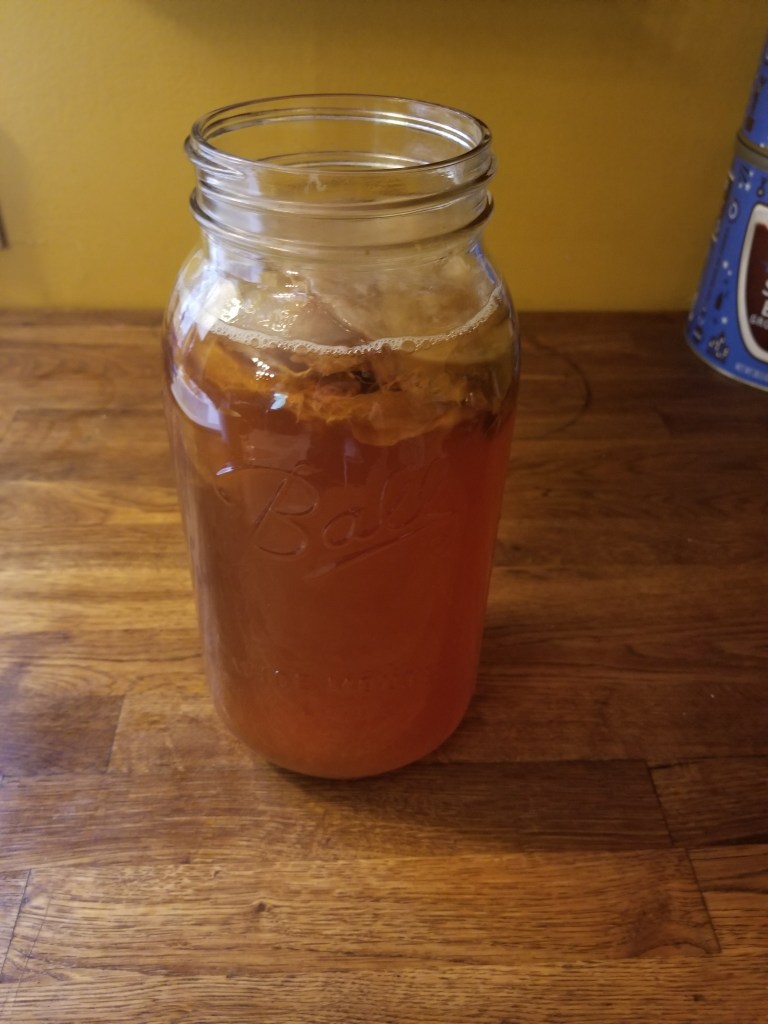
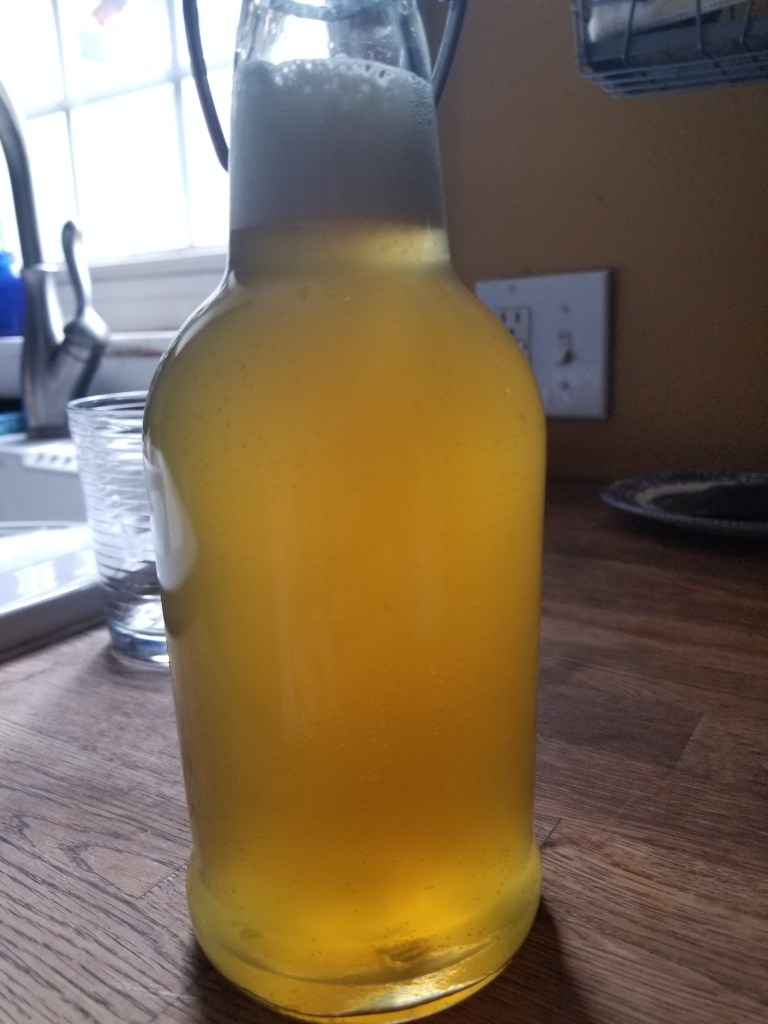
This sounded exactly like what I want to drink all of the time. After brewing, it looked exactly like it should.

An aside, what is Jin? Google provided links to many anecdotes about this kombucha cousin. Essentially Jin is green tea + honey + SCOBY. Some authors claim you can buy a Jin SCOBY off Amazon, others scoff that those products are a kombucha SCOBY trained to live off green tea and feed off honey. Some say it’s yeastier, some purport it has a higher alcohol content. But they all seem to agree on my original statement: refreshing, bubbly, decadent.

Because I have more SCOBY that you can shake a stick at, I did not go through a transition period. In other words, I did not wean the SCOBY whatsoever. It went straight from it’s kombucha into a batch of honeyed green tea. I scaled my recipe down to a quart (1 tbsp green tea + 1/4 c honey) and treated it like there was nothing special about it.

Pros: the fermentation time was on par with regular booch. The Jin grew the most milky white, textbook perfect SCOBY I have ever produced. When bottling, this was clearly the most carbonated product I have fermented. I was stoked.

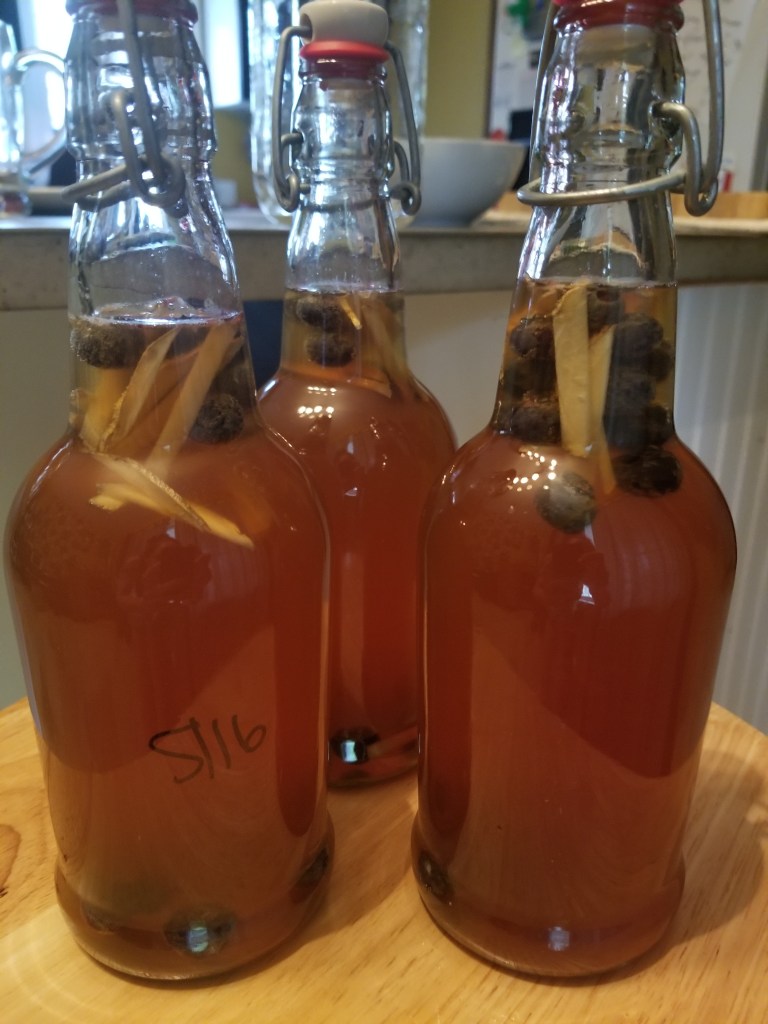
I did a two day second fermentation without releasing any gas. I wanted as much carbonation as possible. I scaled down to two days because I am still wary of exploding bottles. My one quart made one 16 oz bottle full. Perfect for a taster/treat.

.

.

.

I learned I do not like Jin. Maybe the second fermentation was my first mistake, because when I opened the bottle after a few days in the fridge it was completely flat. I knew from previous experience that I did not care for the taste of a half black tea, half green tea kombucha, but I thought full on green tea–which I love hot–would be okay. I even prefer the taste of honey over most sweeteners, but this did not work for me. It tasted like honey-cardboard-malt.

Not one to give up so easily, I brewed a second batch. I scaled up to a half gallon to provide myself the opportunity to experiment further. Knowing that I have had second fermentations fall flat if the booch is too far along (not enough sugar to feed the yeast) or without the addition of fruit (sugar), I went with an old standby.

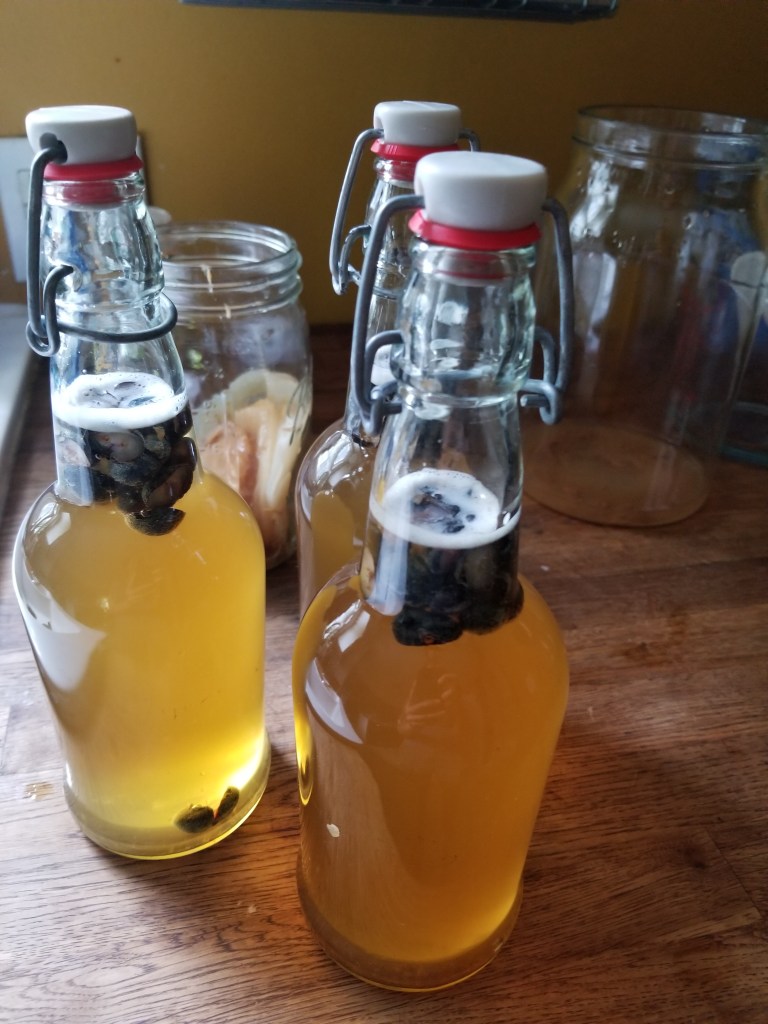
Blueberries, cut in half. Notice the excellent looking SCOBY in the background.

After 3 days, unburped, the Jin had turned a delightful maroon color. I refrigerated it hoping for improved taste and carbonation.

Both of these hopes were partially realized: the taste was much improved, the carbonation less so. However, neither of these factors were increased enough for me to want to continue the experiment. Just because you can eat (or drink) something, doesn’t mean you have to. While I tend to apply this sentiment more often to carrot greens, it was true here as well.

.

.

.

Another maleficence this week: carrot marmalade.

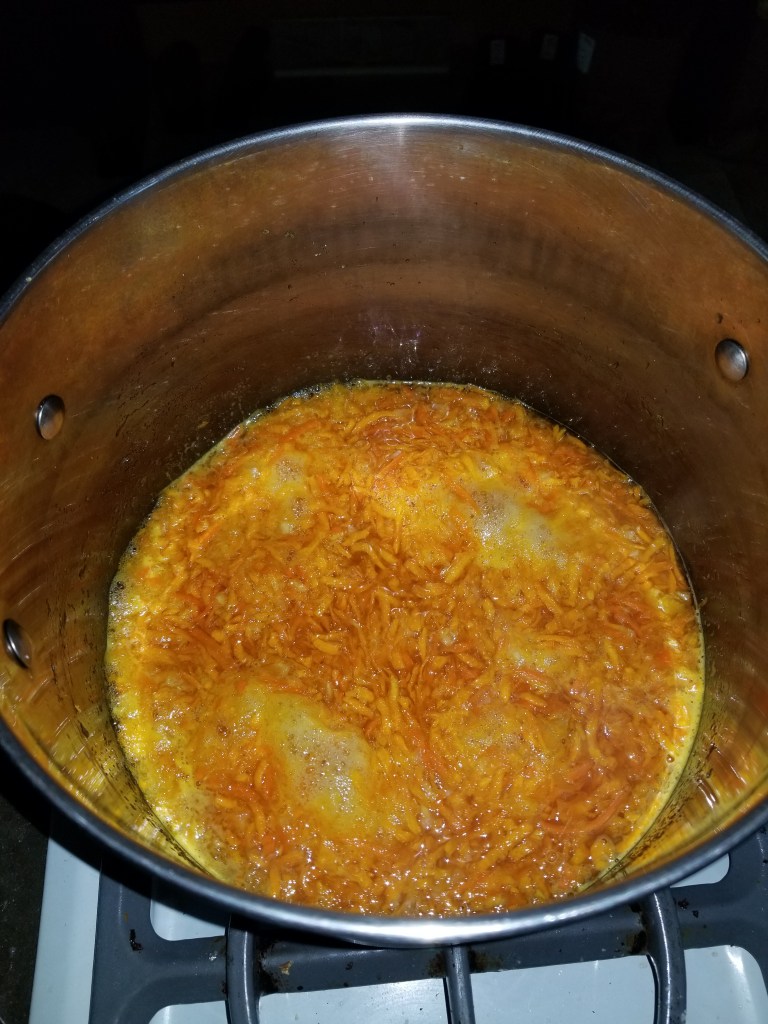
I have a few (er, 5 or so) canning recipe books, but there is one I always go to first: Well Preserved by Mary Anne Dragan. The recipes are well written, easy to understand and produce a delicious product every time. However, they always fall short of their intended target production. Knowing this, I always slightly scale up the recipes. This being my first time making carrot marmalade, I did not scale high enough. What should have been 4-5 jars ended up 3.5 before the bottom fell out of one of them. To add insult to injury, one of the two remaining jars didn’t seal. This equated to four and a half hours of work for one 8 oz jar into the pantry.

While every experiment may not have a successful ending, you are provided the opportunity to learn what you don’t like and potentially what not to do next time. Meanwhile, I still have about 7 pounds of carrots to attend to. I’m thinking about trying carrot halwa and avoiding carrot cake because I know I will eat it all. If you have any favorite carrot recipes, I’d love to hear it.

Kombucha

For the most part, we drink coffee and water in our household. Maybe a soda or juice every other month or so. Kombucha was included in this “treat” list, an occasional extravagance. That is until a fellow dietetic intern gifted me with a SCOBY. Now I ferment my own “booch” every other week.

SCOBY means “symbiotic culture of bacteria and yeast,” which is formed through the conversion of carbohydrates by of lactic acid bacteria, acetic acid bacteria, and yeast to form acids + alcohol; the magical process known as fermentation.

It’s slimy, a bit lumpy and squishy. Each new batch of booch grows a fully functional colony that can be used to ferment subsequent batches. The new layer forms on top, attached lightly to the one(s) below. My SCOBYs are really large at this point–though only one is need to make more kombucha, it seems almost cruel to toss one away. I brought this living thing into being and now it is my responsibility, or something like that. I’ve tried gifting them, but kombucha is a polarizing, acquired taste.

The process is simple. Brew some sweet tea, add previously brewed booch + SCOBY

  • 1 cup sugar to ~ 1 gallon water (14 cups), 8 black tea bags (roughly 3 tbsp loose leaf tea)
  • Bring water to a boil in a stainless steel pot
  • Remove from heat, add sugar and tea, and allow to cool to room temperature
  • Fill half gallon jars with ~7 cups of sweet tea, add previously brewed booch (adds bacteria cultures, yeast, and lowers the pH), add SCOBY right side up, cover with breathable material and set in a cool, dark place.
  • Smell your booch after 3 days, it should have a sour, vinegar like scent.
  • After 5-7 days, begin taste testing.
  • When you are pleased with the tart-sweet ratio, it’s time to bottle!

Some notes: minimize contact with metal, it can alter the taste and hurt the SCOBY. It was a game changer for me when I realized I could label the glass bottles with permanent marker instead of tape: it scrubs right off! Sometimes I add fruit, or fruit juices such as the strawberry I was gifted in exchange for greens. I cover my booch with two coffee filters and a rubber band, though I want to switch to a washable cotton system.

A book I highly recommend if you are interested in fermentation, from the history to recipes using your own fermented foods is Mary Karlin’s Mastering Fermentation. She provides really excellent, detailed information especially as it relates to food safety and sanitation.

While a lot of research has been and continues to be conducting into the benefits of fermented foods for the gut microbiome, it is important to note a few things:

  • Start slow! If you don’t already consume a lot of fermented foods/beverages, it can be a lot for your bowels to handle at once. Yogurt is usually a good place to start. Even if you are lactose intolerant–the bacteria ferment the lactose into lactic acid, essentially digesting it so you don’t have to.
  • Fermented foods contain live bacteria, I would not recommended home fermented foods for those with compromised immune systems.
  • If it smells or tastes “off”, it likely is. I have let batches ferment too long, or used too much tea, and discarded all but a cup to start the next batch.

I learned a few things the hard way, such as only use tea you actually like to drink! I bought some Irish Breakfast tea from the bulk foods store because it was cheap. I did this even knowing I don’t care for Irish Breakfast tea. What happened? My booch tasted like Irish Breakfast. I’m still using it, though in a much lower ratio.

Bacteria need five things to thrive, represented by the acronym FATTOM: food, acidity, time, temperature, oxygen, and moisture. The food is the added sugar, acidity from the cup of previous booch, time + temperature usually 7-10 days though in the summer in my hot house it can be as quick as 3-5, oxygen – orientation is important: the yeast loving bacteria live on the bottom of the SCOBY while the oxygen loving are on top, and I think moisture is pretty self-evident in this case.

If you made it all the way through this quick overview, here is some additional reading should you be ready to take the plunge to brew your own kombucha or want to learn more about fermented foods and the gut microbiome:

Detailed Kombucha directions

Fermented foods and fiber + microbiome

Sourdough starter

https://www.explainxkcd.com/wiki/images/5/5a/sourdough_starter.png
Image from xkcd: https://xkcd.com/2296/

I waited two months into Stay Home to bake my first loaf of banana bread (with zucchini), which was shortly followed by starting a sourdough starter. I’ve been fermenting my own kombucha for about a year and have fermented chili-garlic paste to ferment kimchi, but the pound of yeast in my fridge led me (for good reason) to put off fermenting flour + water.

I followed the directions from the kitchn. Warning: the site has a fair amount of ads, but the directions are thorough and made me feel confident in my wild yeast harvesting ability.

The day 5 directions indicate that 1/2 of the starter should be used or discarded. I’m not one to discard just about anything–you can hear me chanting “waste not one grain of rice!” when wrapping up leftovers–and as I have had success with their recipes in the past, I chose to follow the advert at the end of the starter recipe to make a loaf of bread with the “discard” plus yeast (as we know, I have plenty).

While it may look roughly like bread, this was a severe disappointment. My baking projects are almost exclusively 50% excellent and 50% “okay I’ll eat it, but never make it again”. However, waste not want not, right?

Fortunately, we were out of breadcrumbs.

When I have stale bread, or small, nubby loaf heels, I usually cube and bake them to make croutons for french onion soup, but I already have about a half gallon of them in the freezer.

Making breadcrumbs is similar: cut the bread into thin slices, bake at a low temperature (I did 250°F) until extremely crisp, but not burned. Break into chunks into food processor (or blender, or coffee grinder if that’s all you have) and process until you are pleased with the consistency. Store in an airtight container in a cupboard.

However, neither the disappointing bread nor resulting crumbs were the reason behind this fermentation project. Can you guess?

Store bought “sourdough” english muffins are not flavorful and I have plenty of time on my hands to rectify this.

I had five days to peruse recipes online while my starter ripened, and I settled on this one based on not only the sheer volume of positive reviews, but most of them added photos! Surely I could follow this recipe and yield a product that at least looked like it should.

I ended up with 20 portions and a wee nob left over to make a tester. So far so good! It looked like an english muffin, had a nice crumb, and tasted good too! I was all set to cook up the rest.

A rousing success for my first try.

The only downside? Just like store bought they weren’t sour enough! Hopefully now that my starter is older and more pungent the next batch will be even better.

This afternoon, as an experiment, I added some of the starter to this week’s batch of naan (called narn in our household). It’s rising now and here’s hoping for delicious! Did you challenge yourself to bake anything new this week?